| Week 1 | T&L Activities:
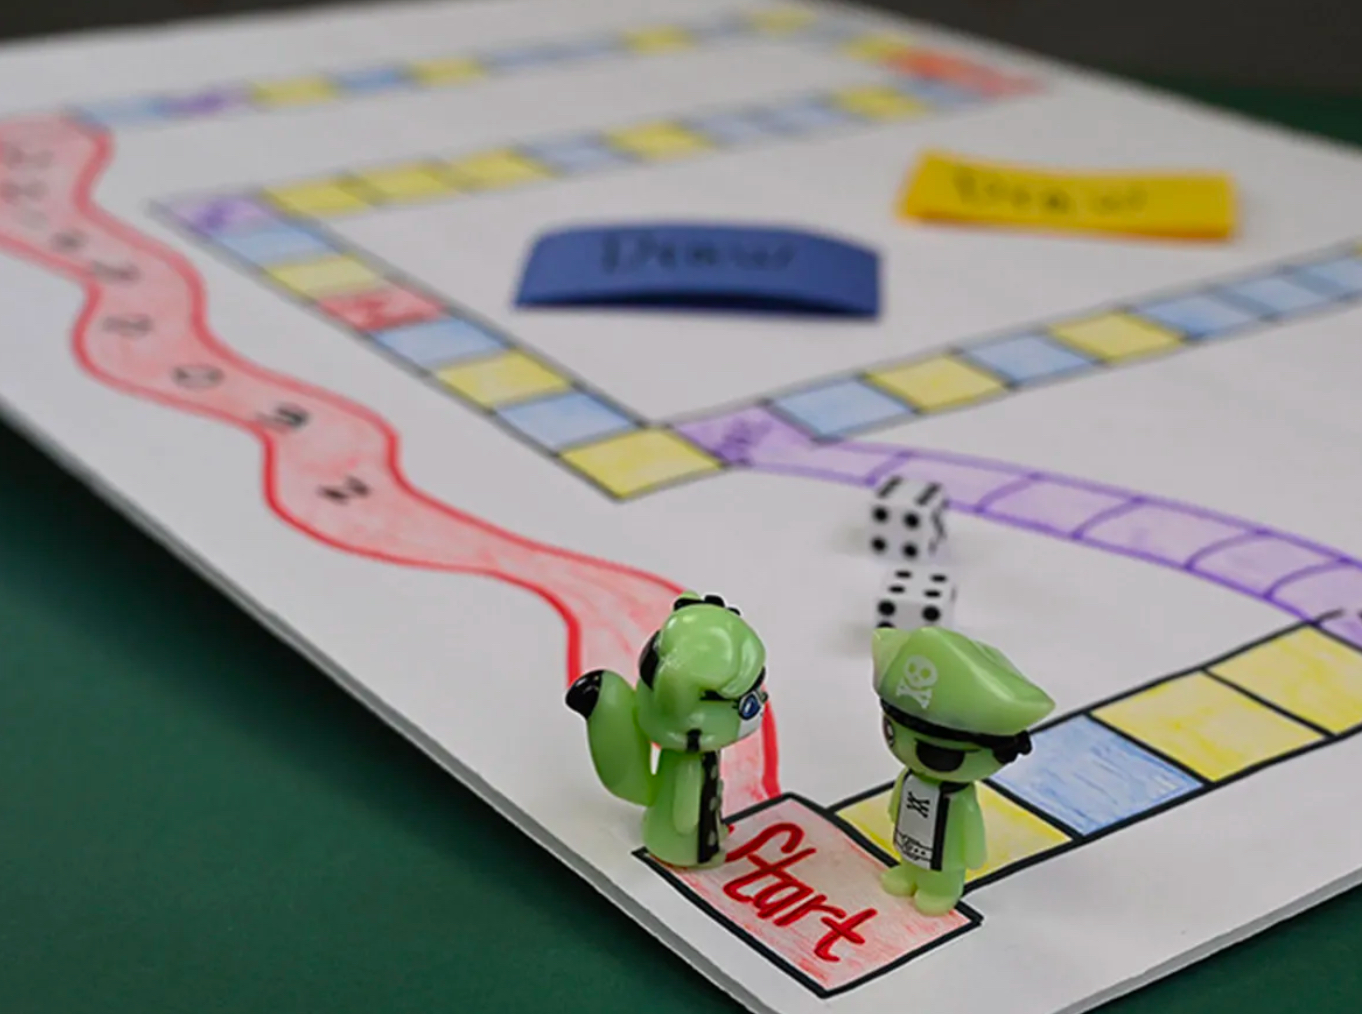
PowerPoint Game
In pairs you need to design a game that you will create later in the session, you will produce this in PowerPoint. In any project or product, PLANNING is a Key and important part of the process to develop something. In our game, we need to have an idea of the end result, the mission, and the product goal.
Task 1. In your pairs discuss the ideas that you may have for your game idea, remember to be open to criticism and to be challenged on your ideas. The developments and discussions you have could improve your idea from GOOD to OUTSTANDING. You should document these ideas using MS word or other text editors. You may also find the use of online mind mapping tools enables you to extend your ideas to levels that you may have not considered, or even twists in the plot.
Task 2. Now that you have planned your game idea it is time to start developing it, you may be able to work on the same PowerPoint using collaboration in office 365, alternatively nominate one of your pair to create the framework of the game and the decisions and the other person can use their PC and time to source the images, and text to go into your game.
Task 3. Now that your game is complete, you will want to show it off to your friends and peers, however, you will need to check that it works first, it is important that this is done as the person may find a problem and not want to play. Create a test plan of the things in your game that you would look to see that work.
Task 4. Use others' games and test plans and follow through them, if there are any issues that are not on the test plan add them to it.
Task 5. Create a simple review of the game that you have played and give your comments on your experiences. Files that support this week | English:
|
Assessment:
Anonymous Assessment - Learners assess an anonymous piece of work containing deliberate mistakes against given success criteria. Anonymous Assessment - Learners assess an anonymous piece of work containing deliberate mistakes against given success criteria. |
Learning Outcomes:
|
Awarding Organisation Criteria:
|
| Maths:
|
|||||
| Stretch and Challenge:
|
E&D / BV | ||||
| Homework / Extension:
|
ILT | ||||
| → | → | → | → | → | → |
| Week 2 | T&L Activities:
Excel Battleships
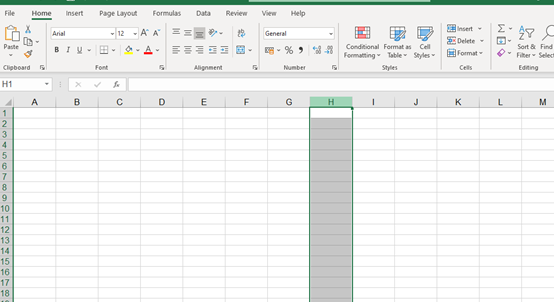
In this tutorial we will use the Microsoft Excel application to create the iconic game of Battleships. This game makes use of the rows and column in excel as co-ordinates to allow us to make a two player game.
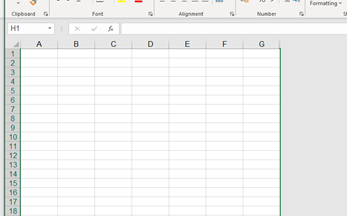
Step 1. Select COLUMN H by clicking on the letter as demonstrated in the below image
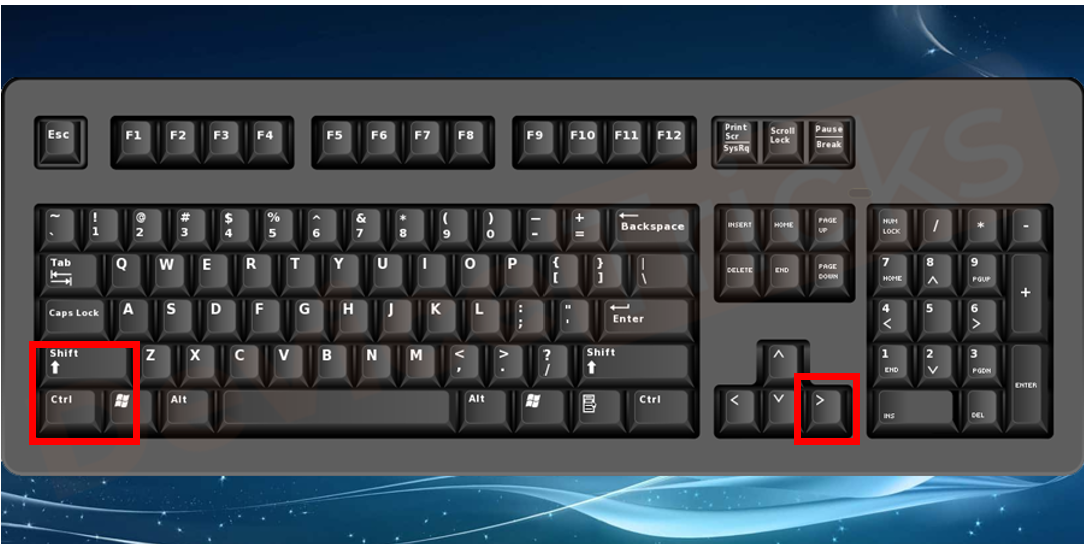
Step2. Now that you have selected column H you will need to press and hold down the “Shift” and “CTRL” buttons together, then press the arrow to the right on your keyboard.
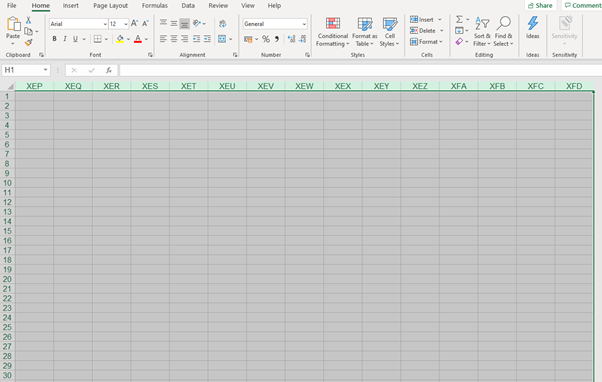
This will select all the columns to the right as is shown in the image below
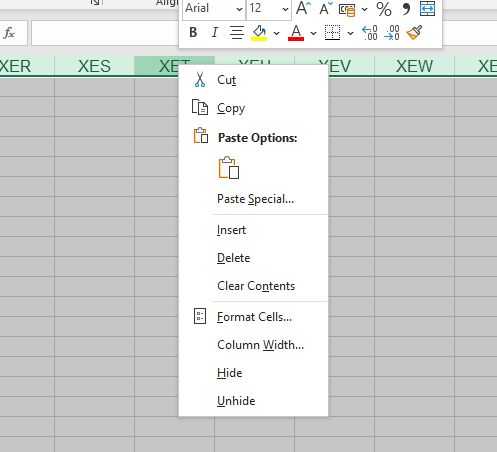
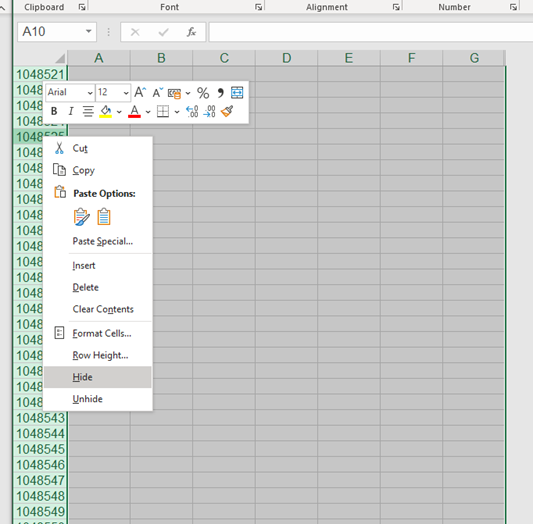
Step 3. We now need to hide these columns as we do not need them. To hide these we need to right click our mouse button when our cursor is hovering over one of the column headings.
We then need to select the Hide option
This will make all of the selected columns disappear Step 4. We now need to duplicate steps 2 and 3, however this time we need to select the ROWS.
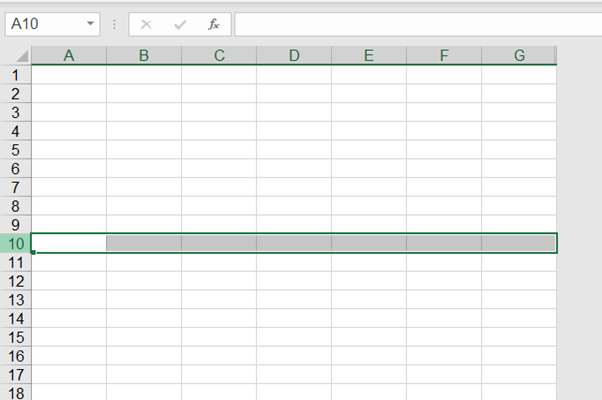
Select Row 10 by click on the number 10 as shown in the below image
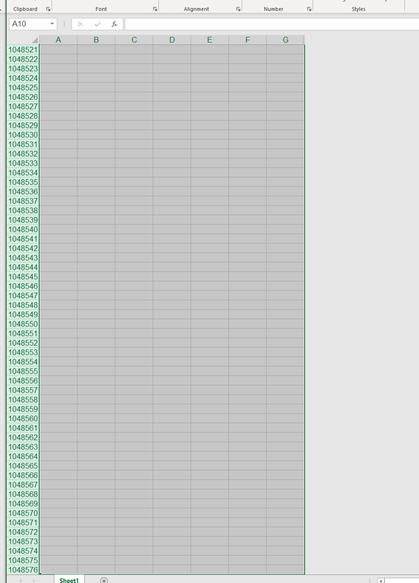
you will need to press and hold down the “Shift” and “CTRL” buttons together, then press the arrow to the down on your keyboard.
This will select all the rows below 10 as is shown in the image on the next page
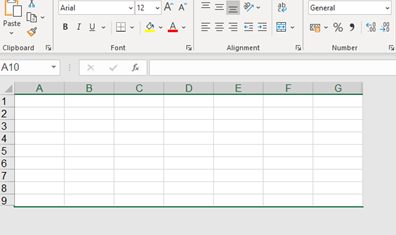
Step 5. We now need to hide these rows as we do not need them. To hide these we need to right click our mouse button when our cursor is hovering over one of the row headings.
We then need to select the Hide option
Your page should now look like the image below
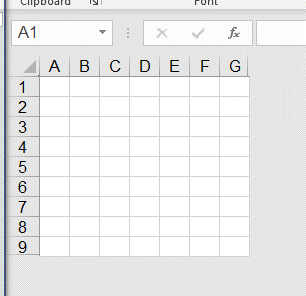
Step 6. We now want to make our cells in our grid look like squares. For us to do this we need select columns. Click on the corner highlighted below
You will need to Left click and hold down the button and then move the column to the correct size.
When you release the left mouse button you grid will look like the below image
We now have our first grid.
This grid will be our grid to place our ship in the game, but, we need one for the enemies ship.
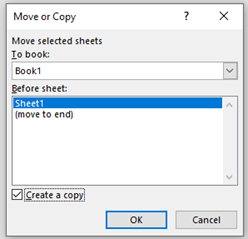
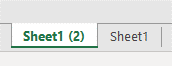
Step 7. We need to make a copy of the worksheet that you have just created. To create a copy you will need to right click the sheet tab at the bottom of the screen
Then select move or copy
We then need to check the “create a copy” option on the message box that opens and select ok
You should now have 2 sheets at the bottom.
Step 8. You will now need to rename these. You should rename them My Ships Enemy Ships To rename them right click whilst your mouse cursor is over the sheet you wish to rename and select rename
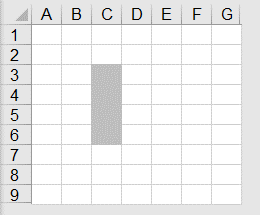
Step 9. Now it is time to place on the “My Ships” worksheet where you would like your ships to go. You have; 1 aircraft carier that spans 4 cells 1 Destroyer ship that spans 3 cells 2 Boarding ship that spans 2 cells Top place these ships we need to colour in the cells that they span. To colour the cells you will firstly need to select the location and cells you want. To do this Left click and hold down your mouse and move it in the direction you wish to select until your selection is covered. Example is shown below
Now we need to apply the colour. You need to move your cursor up to the paint bucket tool, here you can select the colour of your fill. As this is a ship I will choose Grey
I now have my ship located Now you need to place the rest of the ships following the process in step 9.
Step 10. GAME TIME. Find a player and start asking asking them if they have a ship in cell “C2” if they don’t colour the cell in your enemy ship worksheet Blue as this represents water. You should use the same process we used in task 9 to fill a cell with colour. If it is a HIT you should could this Red.
Step 11. ENJOY
Files that support this week | English:
|
Assessment:
Anonymous Assessment - Learners assess an anonymous piece of work containing deliberate mistakes against given success criteria. Anonymous Assessment - Learners assess an anonymous piece of work containing deliberate mistakes against given success criteria. |
Learning Outcomes:
Co-ordinates using X and Y axis Dexterity skills using hand eye co-ordination. Verbal Communication. Stratergies and Tactics. Cells and Columns. Paint bucket fill colour combinations. Following instruction. |
Awarding Organisation Criteria:
|
| Maths:
|
|||||
| Stretch and Challenge:
|
E&D / BV | ||||
| Homework / Extension:
|
ILT | ||||
| → | → | → | → | → | → |
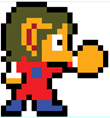
| Week 3 | T&L Activities: 8-Bit Alex Kidd Character Design Illustrator CS6
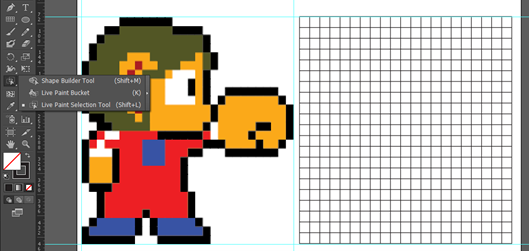
Load the Alex Kidd file below file in Illustrator; you should be presented with the following Click and hold you mouse on the line selection tool to get the following menu to come up
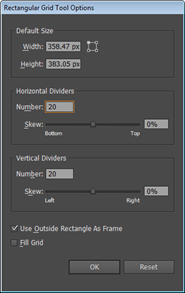
Select the rectangular grid tool and click once in the top left corner of the blue guide lines box to set the registration point, you should then use the following settings
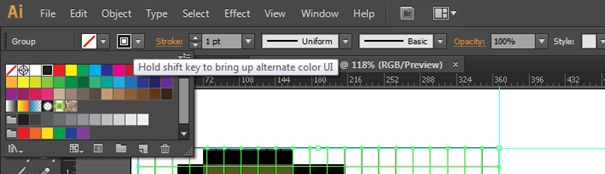
Now we need to give the table an outline so that we can see each and every pixel, so we chose the outline colour as below and set it to black with the line weight set to 1cm as below.
With the move tool (shortcut is the V key) move the table over to the other side of the canvas so that we can work on it, once you have started moving it then hold shift down as you move to ensure that it moves in a straight line. If you try to hold shift down and then move it, it won’t do anything.
Next we need to click and hold on the tool below to get the following window come up and we will chose Live Paint Bucket tool. You need to make sure that your table is selected first and then once you have chose your live paint tool click on your table once to activate this tool. (Please note that the table size is not identical to the example image on left)
If this window should appear, just accept it
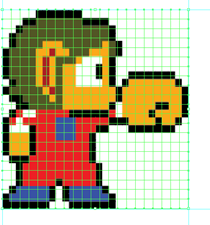
We are now ready to start making our character. Firstly you need to click of off the table so that it is no longer highlighted otherwise we will fill it with colour. You need to select the eyedropper tool (the shortcut is I on your keyboard) once you have the eyedropper up you can select a colour from our reference picture of Alex the kid.
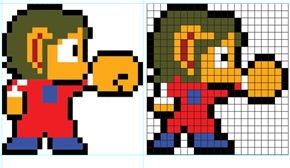
Once you have your reference colour chose the live paint tool again (shortcut is K) and start to drop the colour in the places that you would like it so that it matches the original as close as is possible. (Copy my new example on the right below, TIP count the squares)
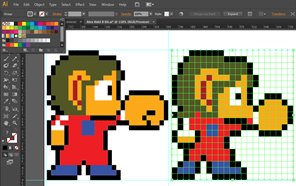
Once your ready for a new colour, eye drop the colour from the original and go again until you have your finished character like below.
Once you’re happy with your character click on your grid with the select tool and tern the stroke colour to no stroke so that the boxes no longer have an outline anymore.
Files that support this week | English:
|
Assessment:
Anonymous Assessment - Learners assess an anonymous piece of work containing deliberate mistakes against given success criteria. Anonymous Assessment - Learners assess an anonymous piece of work containing deliberate mistakes against given success criteria. |
Learning Outcomes:
|
Awarding Organisation Criteria:
|
| Maths:
|
|||||
| Stretch and Challenge:
|
E&D / BV | ||||
| Homework / Extension:
|
ILT | ||||
| → | → | → | → | → | → |
| Week 4 | T&L Activities: Step 1​ Open a new document in Illustrator. You can set it to the size you prefer to work in. In my case I have it set at 500px by 500px. Next turn on the grid (View > Show Grid) and set the Snap to Grid.
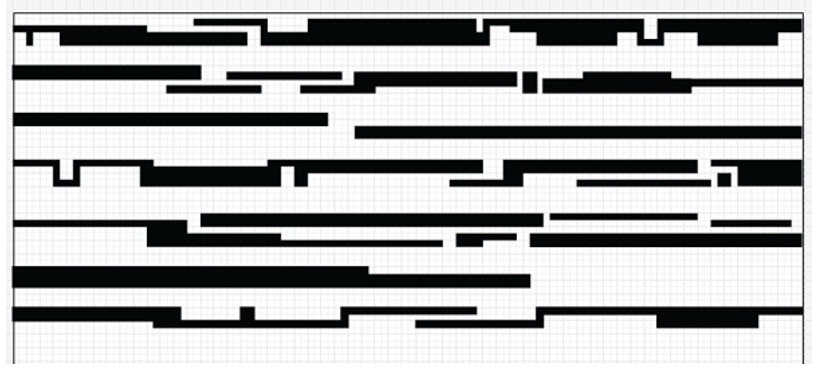
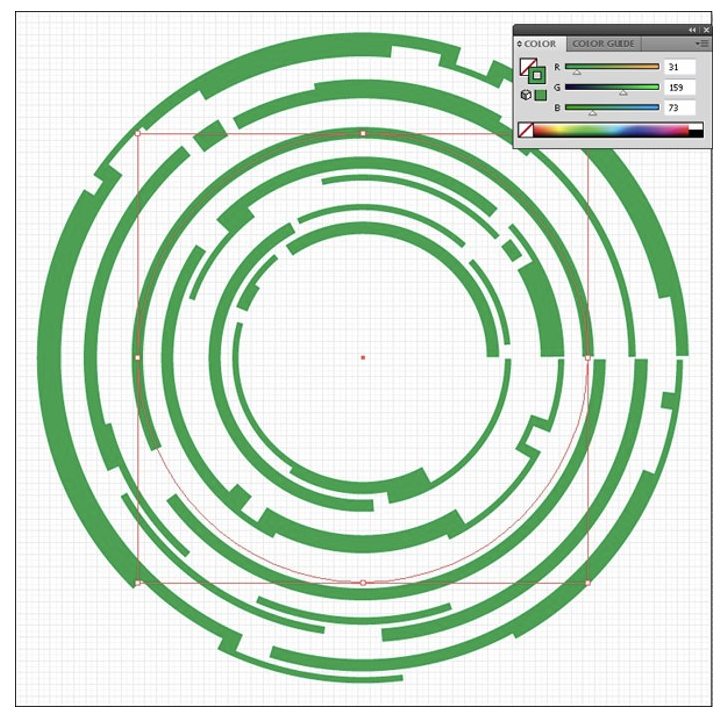
Step 2​ Use the rectangle tool (M) and turn off stroke and turn on fill to any color you like and start drawing any rectangular shape you would like to see in your HUD rings. Be creative, or you could follow what I have in the picture.​ With the grid and snap-to-grid functions turned on, you can easily just fill in the grid to the shape you desire. Fill the entire width of your canvas.
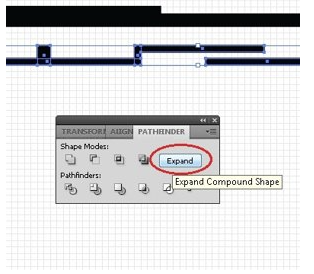
​ Alternatively, you can fill in only half of the width of the canvas to get the half-circle shape, however, you must also fill in the remaining of width of the canvas with a rectangle shape with fill and stroke turn off. Step 3​ Once you are done drawing the pattern you like, select all (Control + A) the rectangular shapes you have drawn to make up the pattern. Now use the pathfinder tool, click on ‘Unite’ (remember to hold down the ‘Alt’ key when you click on ‘Unite’), then press ‘Expand’.​ Now you have just made your first pattern for your high-tech style ring.​ If you have created a pattern that only fills up half the width of the canvas; when using the pathfinder tool; only select the rectangles with fill on.​ To use the pathfinder tool, you can go under Effect > Pathfinder, or press (Control + Shift + F9) to open the pathfinder tool palette.
Step 4​ ​Repeat Step 2 and 3 as many time as you like. In my case, I made a total of 7 different patterns.
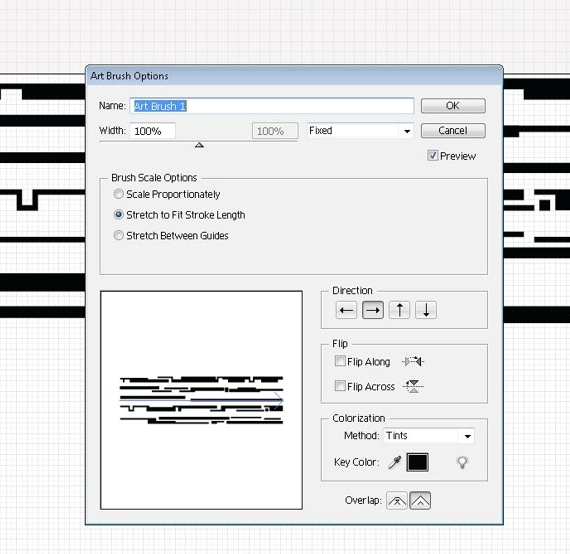
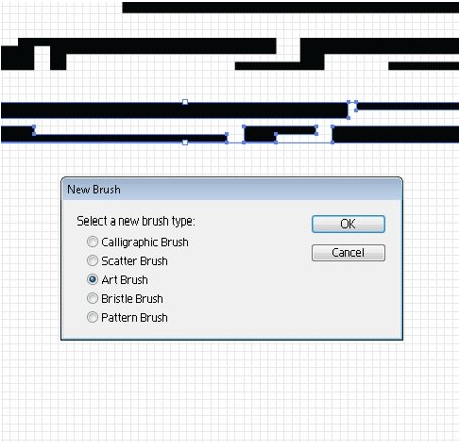
Step 5​ Now select all (Control + A) your patterns and drag them into the brush palette. Alternatively, you can click on the "New Brush" button at the bottom of the brush palette. The "New Brush" window will pop up. Now choose "Art Brush" and click OK.
You can name your brush any name you like or leave it as the default name. Under Colorization > Method, choose "Tints" from the drop-down menu box. Click OK, and now you have just created your own brush pattern.
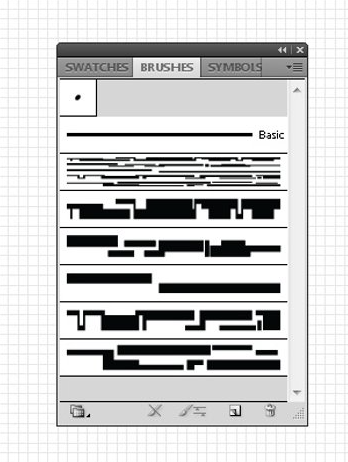
Step 6​ Alternatively, you can choose to set each individual pattern as an "Art Brush". Once you are done, your brush palette should have something similar to the picture.​ If you have patterns that only fill up half the width of the canvas, don’t forget to also select the rectangle with no fill and stroke on as well as the rectangles that you applied the pathfinder tool on when you create a new brush.
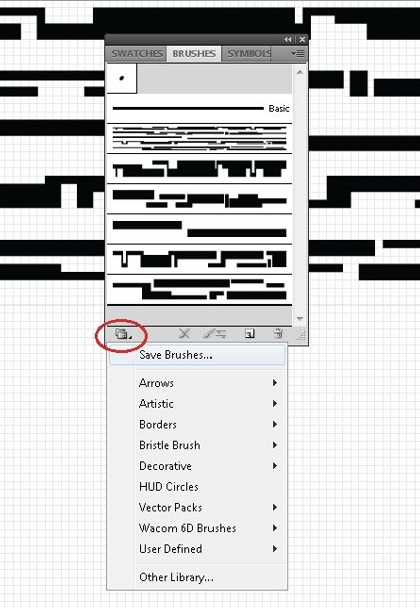
Step 7​ Now I recommend you save the brush you have just created by clicking on the folders button at the bottom left corner of the brush palette.
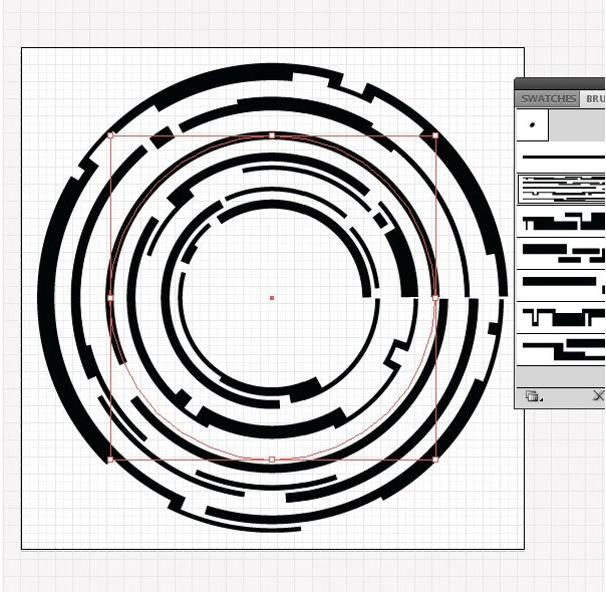
Step 8​ Now use the Ellipse tool (L), set it to no fill, and set the stroke to any color you like and the stroke size you like. Hold down the Shift key to draw a perfect circle outline on the canvas. Hold down the Alt key as well if you want the circle to expand from the center.
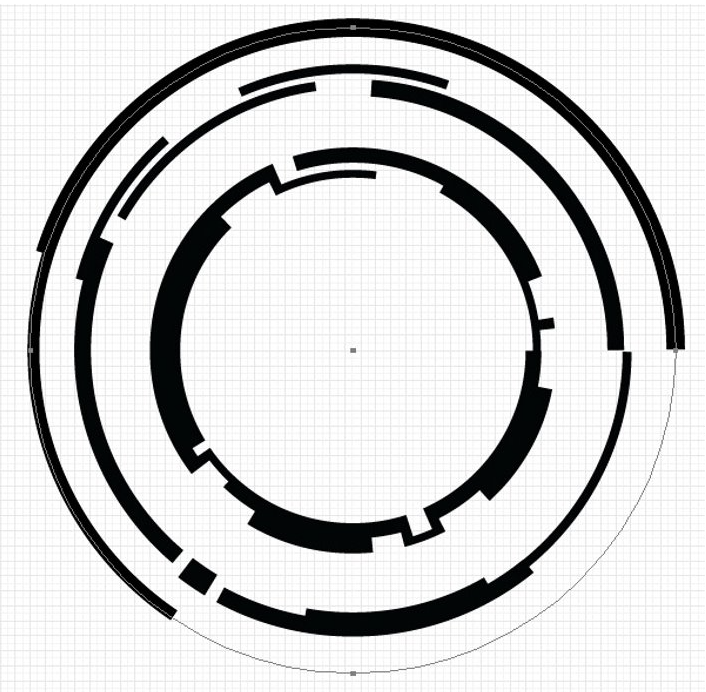
Step 9​ With your newly created circle outline still selected, click on the brush pattern you have designed in the brush palette.​ Voila! You have just created your own high-tech style HUD rings.
You can change the colour of the rings by playing around with the colour palette.
Now, if you have set each individual pattern as an Art Brush, you can create a few circle outlines and apply a different brush pattern to each circle outline to your liking.
Conclusion​ To finish off this tutorial, here are some pointers for future reference. If you have set individual pattern as individual brush, you can have as many patterns as you want and create a different style of HUD rings to your liking.​ Files that support this week | English:
|
Assessment:
Anonymous Assessment - Learners assess an anonymous piece of work containing deliberate mistakes against given success criteria. Anonymous Assessment - Learners assess an anonymous piece of work containing deliberate mistakes against given success criteria. |
Learning Outcomes:
|
Awarding Organisation Criteria:
|
| Maths:
|
|||||
| Stretch and Challenge:
|
E&D / BV | ||||
| Homework / Extension:
|
ILT | ||||
| → | → | → | → | → | → |
| Week 5 | T&L Activities:
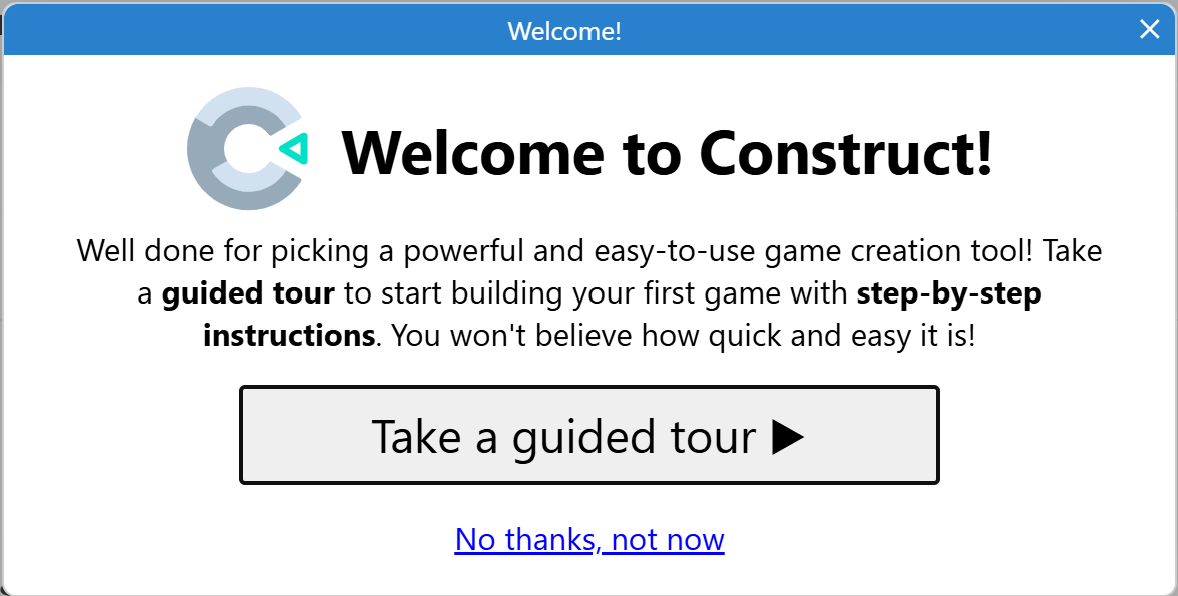
Construct 3, a popular web-based game development platform, allows users to create games without coding, using a visual event-based system. Here’s a simple step-by-step guide to get started with Construct 3:
Step 1: Sign Up and Log In
1. Go to the Construct 3 website. 2. Sign up for an account if you don’t have one, or log in with your existing account.
Step 2: Start a New Project
1. Once logged in, click “New Project” on the main dashboard. 2. Choose a template or start a blank project. Templates are a great way to learn by example, while a blank project gives full creative freedom. 3. Name your project and set parameters like resolution. Then, click “Create”.
Step 3: Familiarize Yourself with the Interface
1. Layout View: This is where you design your game visually by placing objects. 2. Event Sheet: This is where you define game logic using event-based coding. Instead of traditional code, you’ll add conditions and actions visually. 3. Properties Panel: This allows you to set properties for objects and layers.
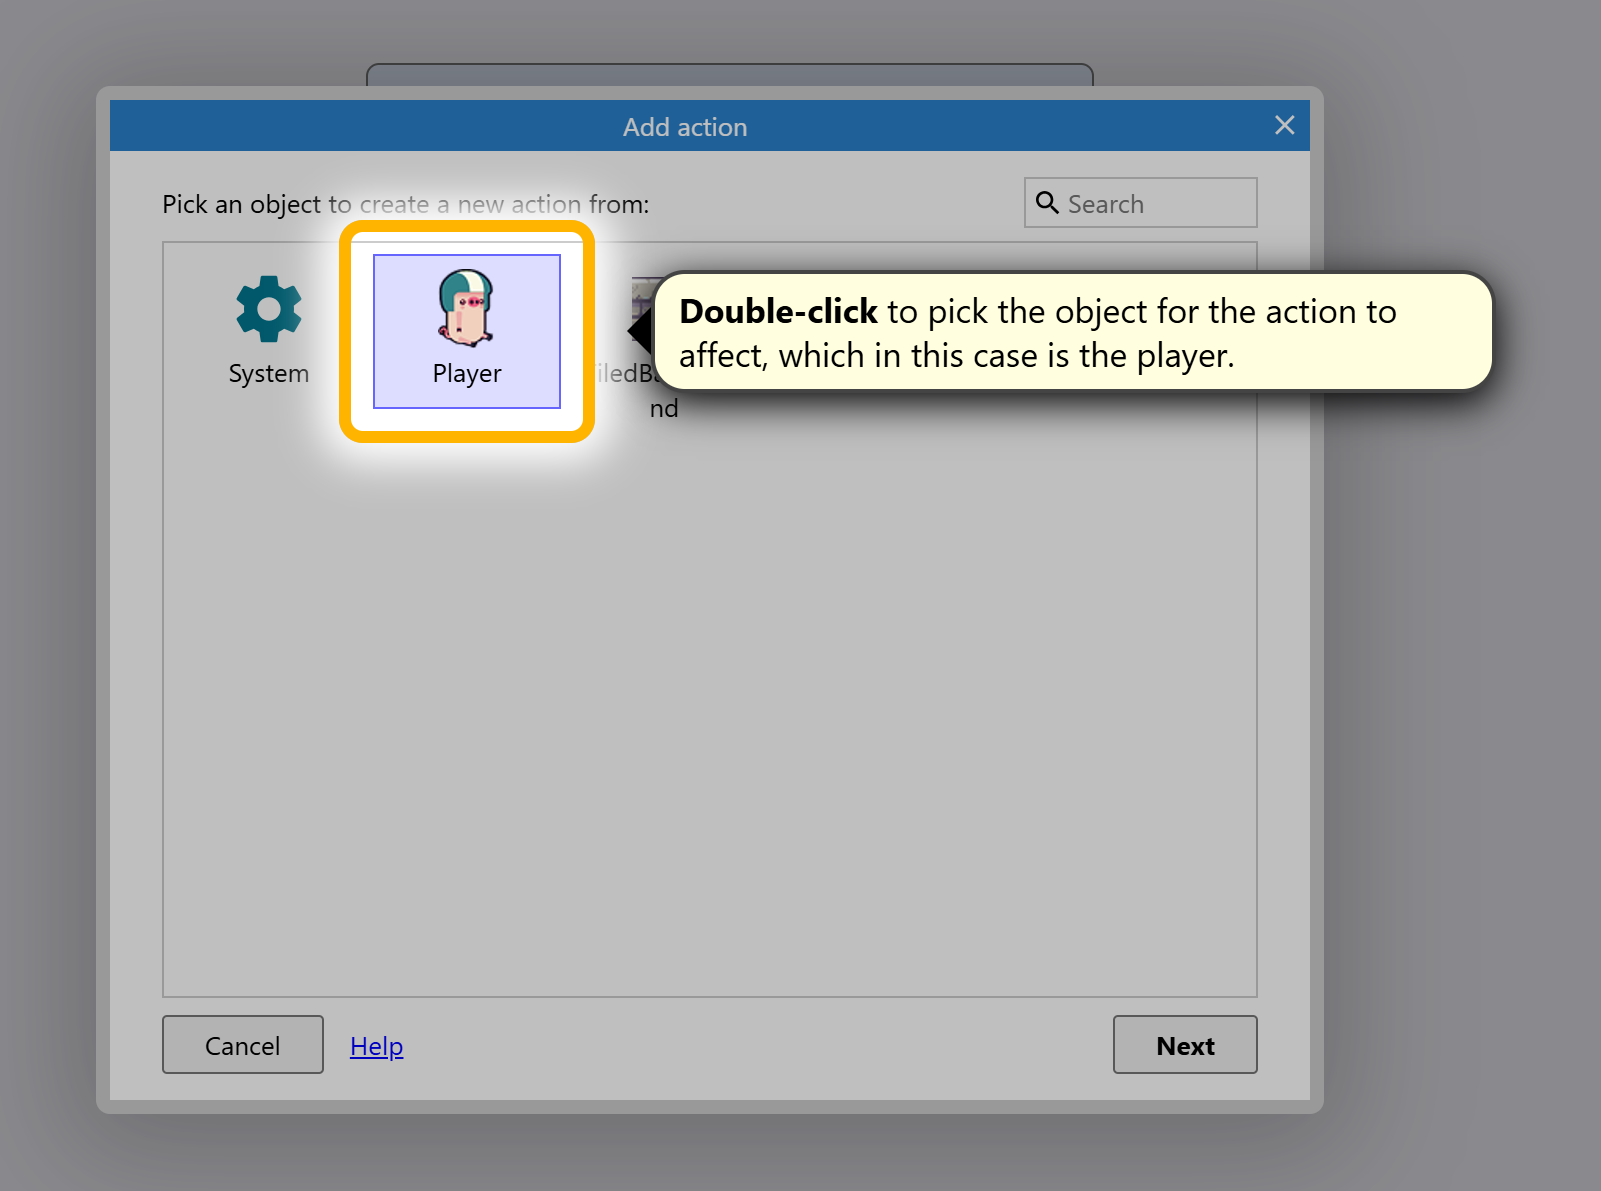
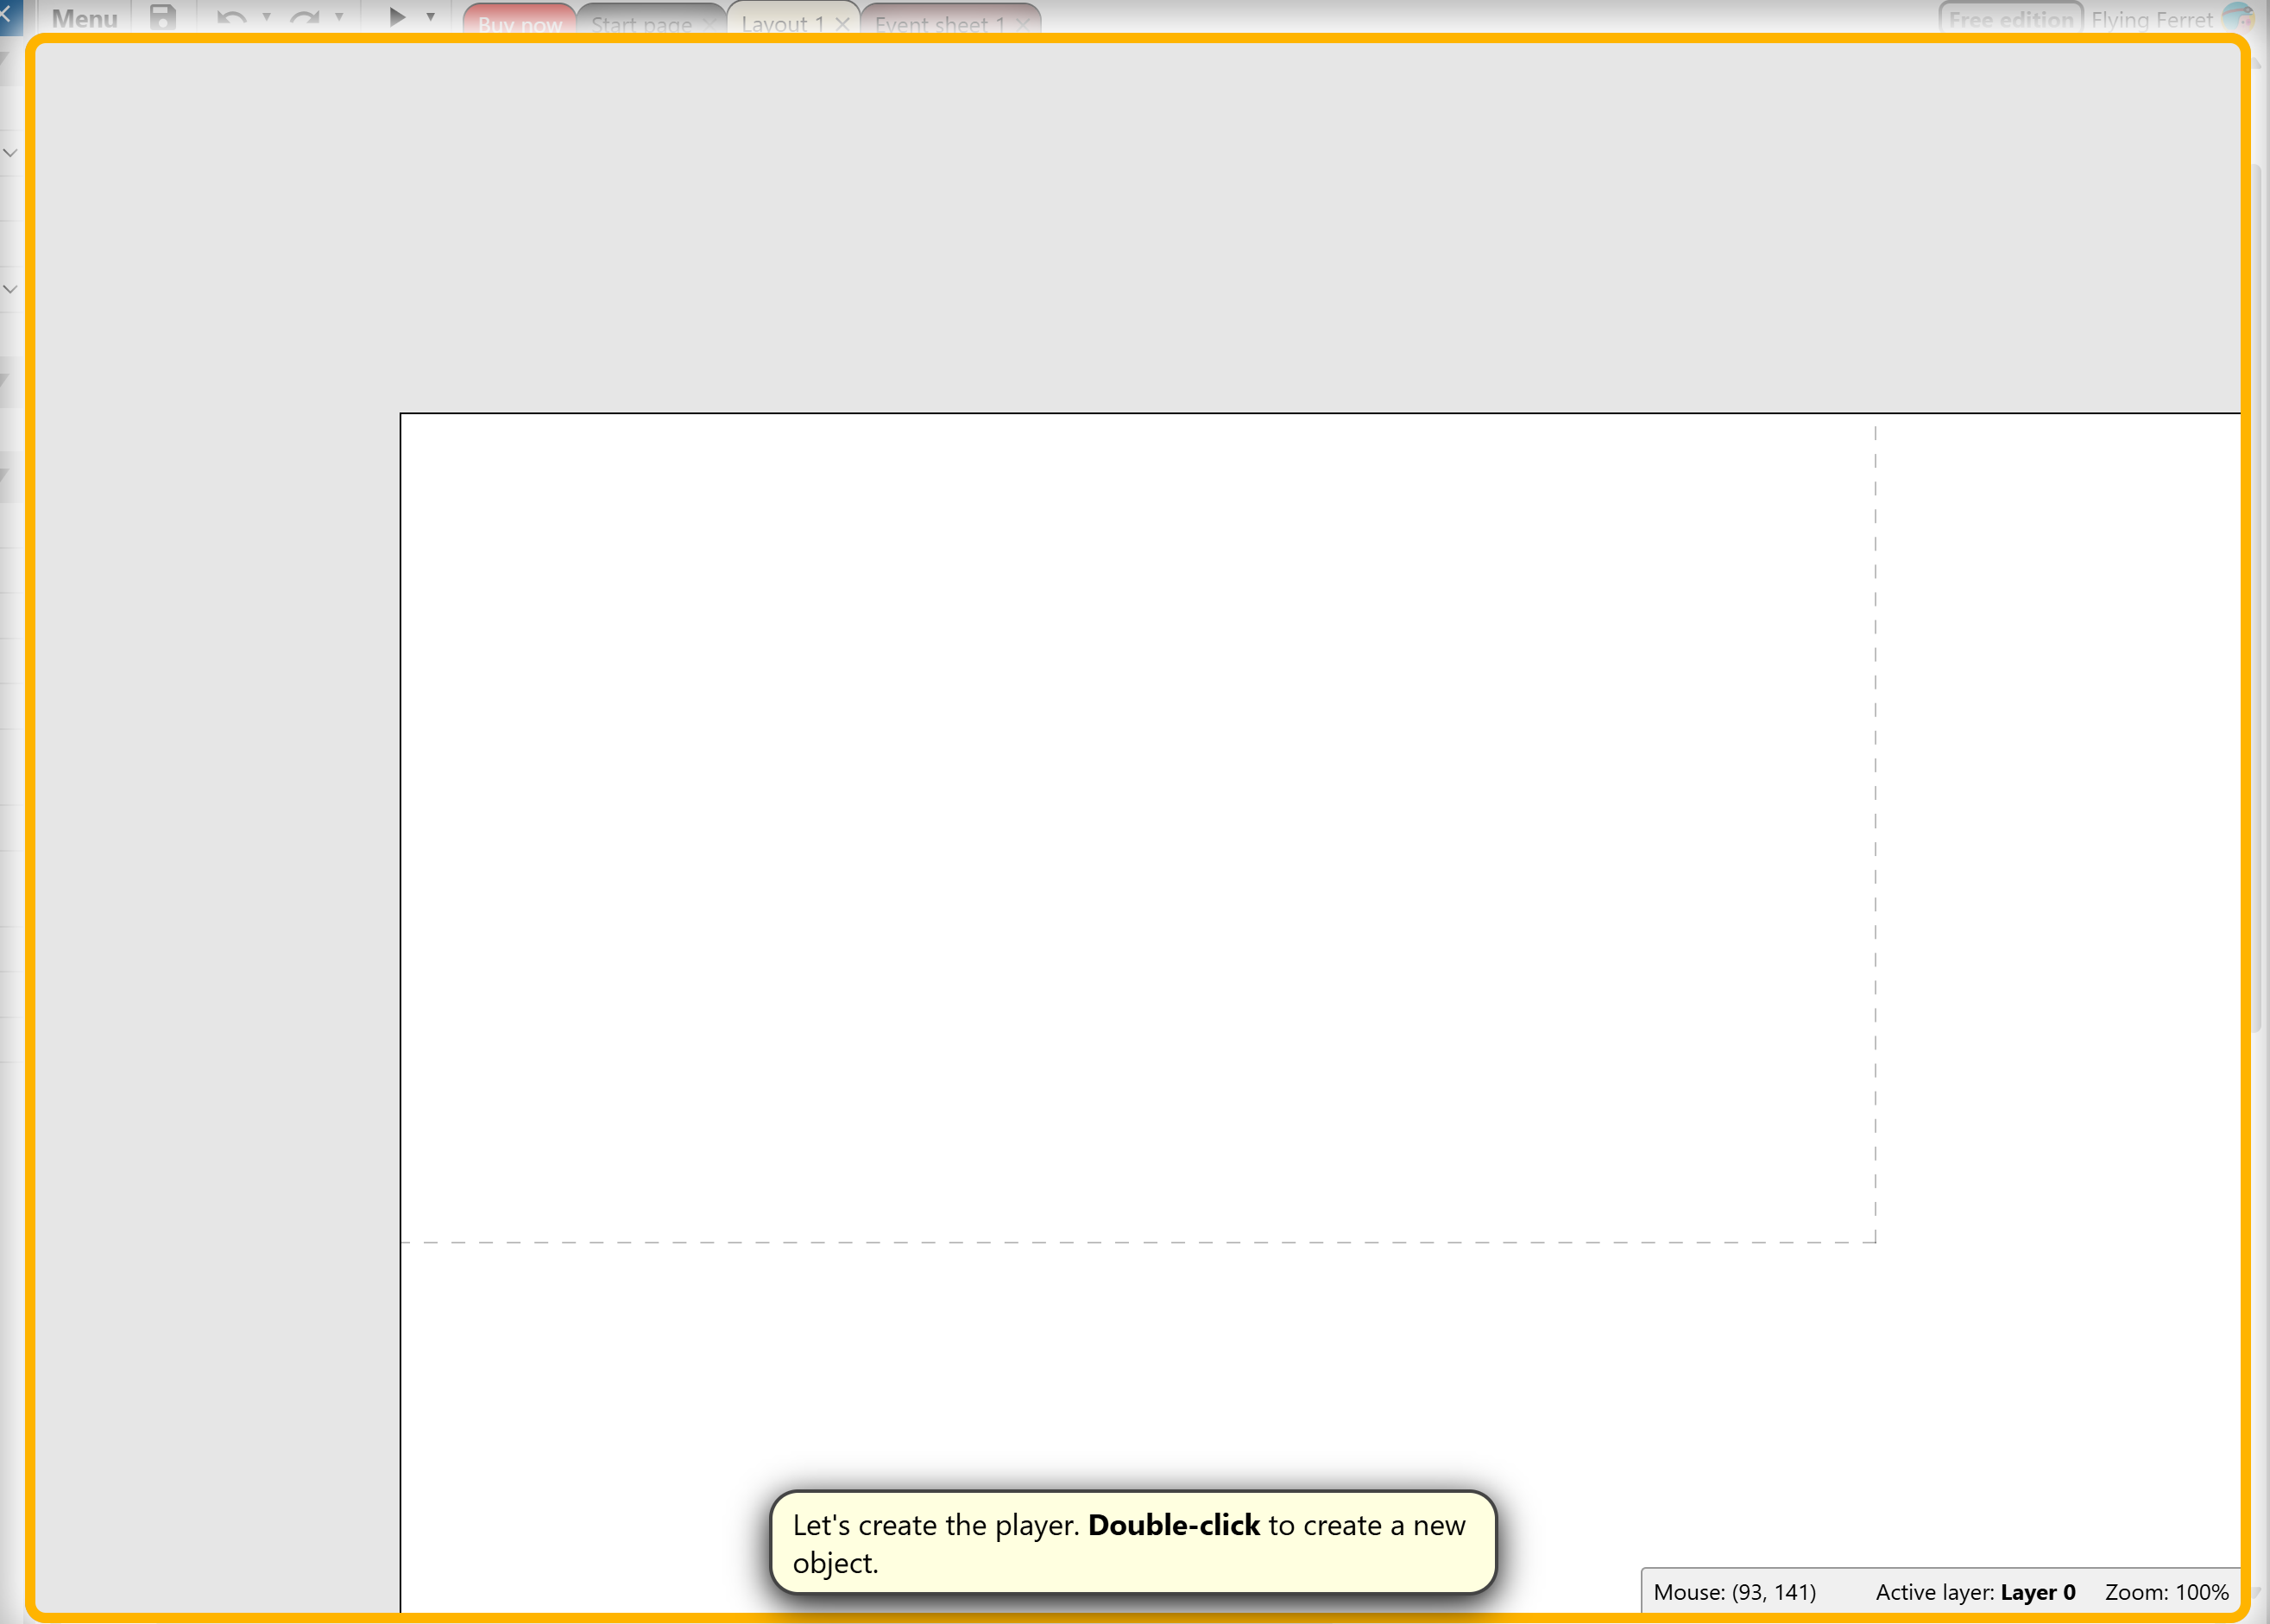
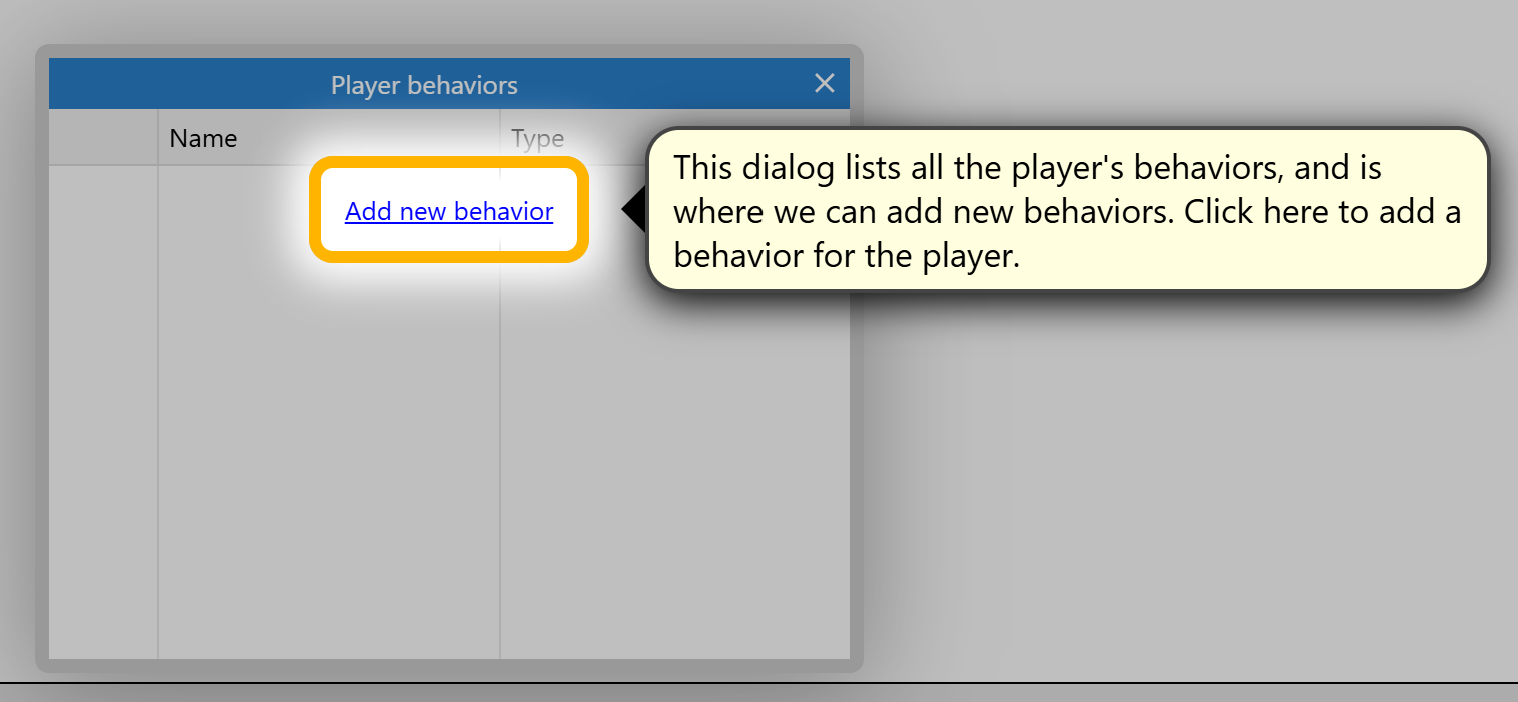
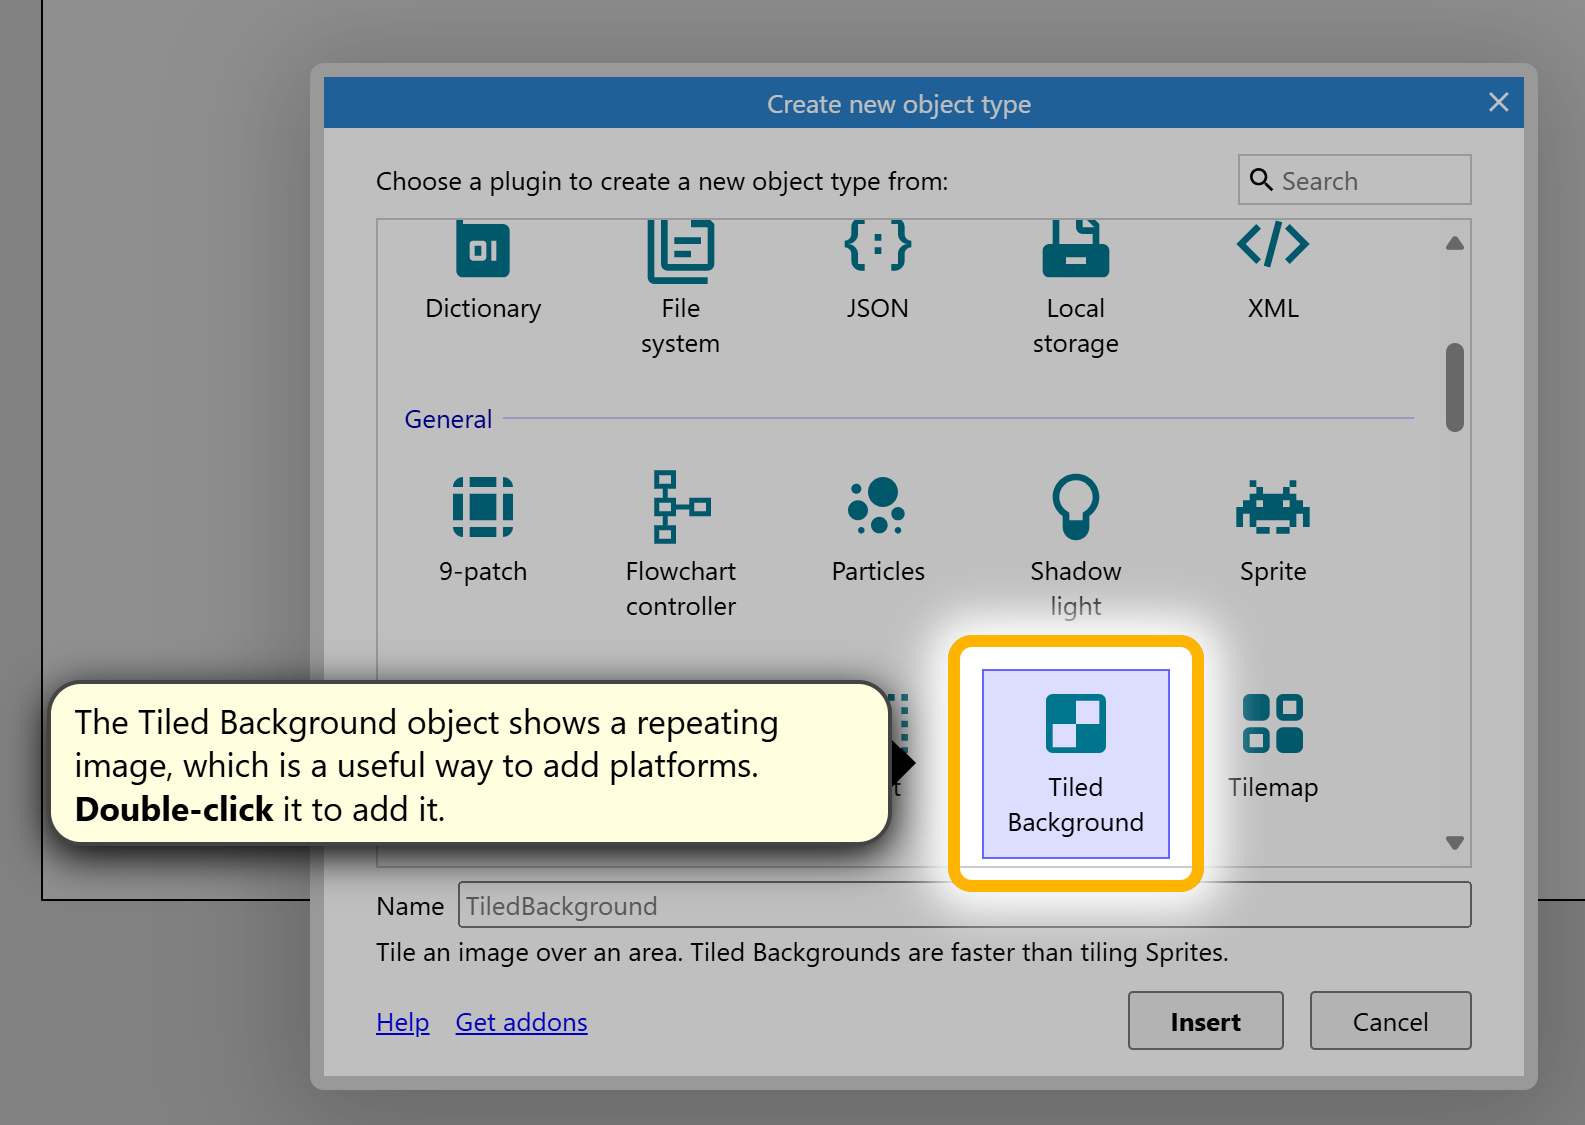
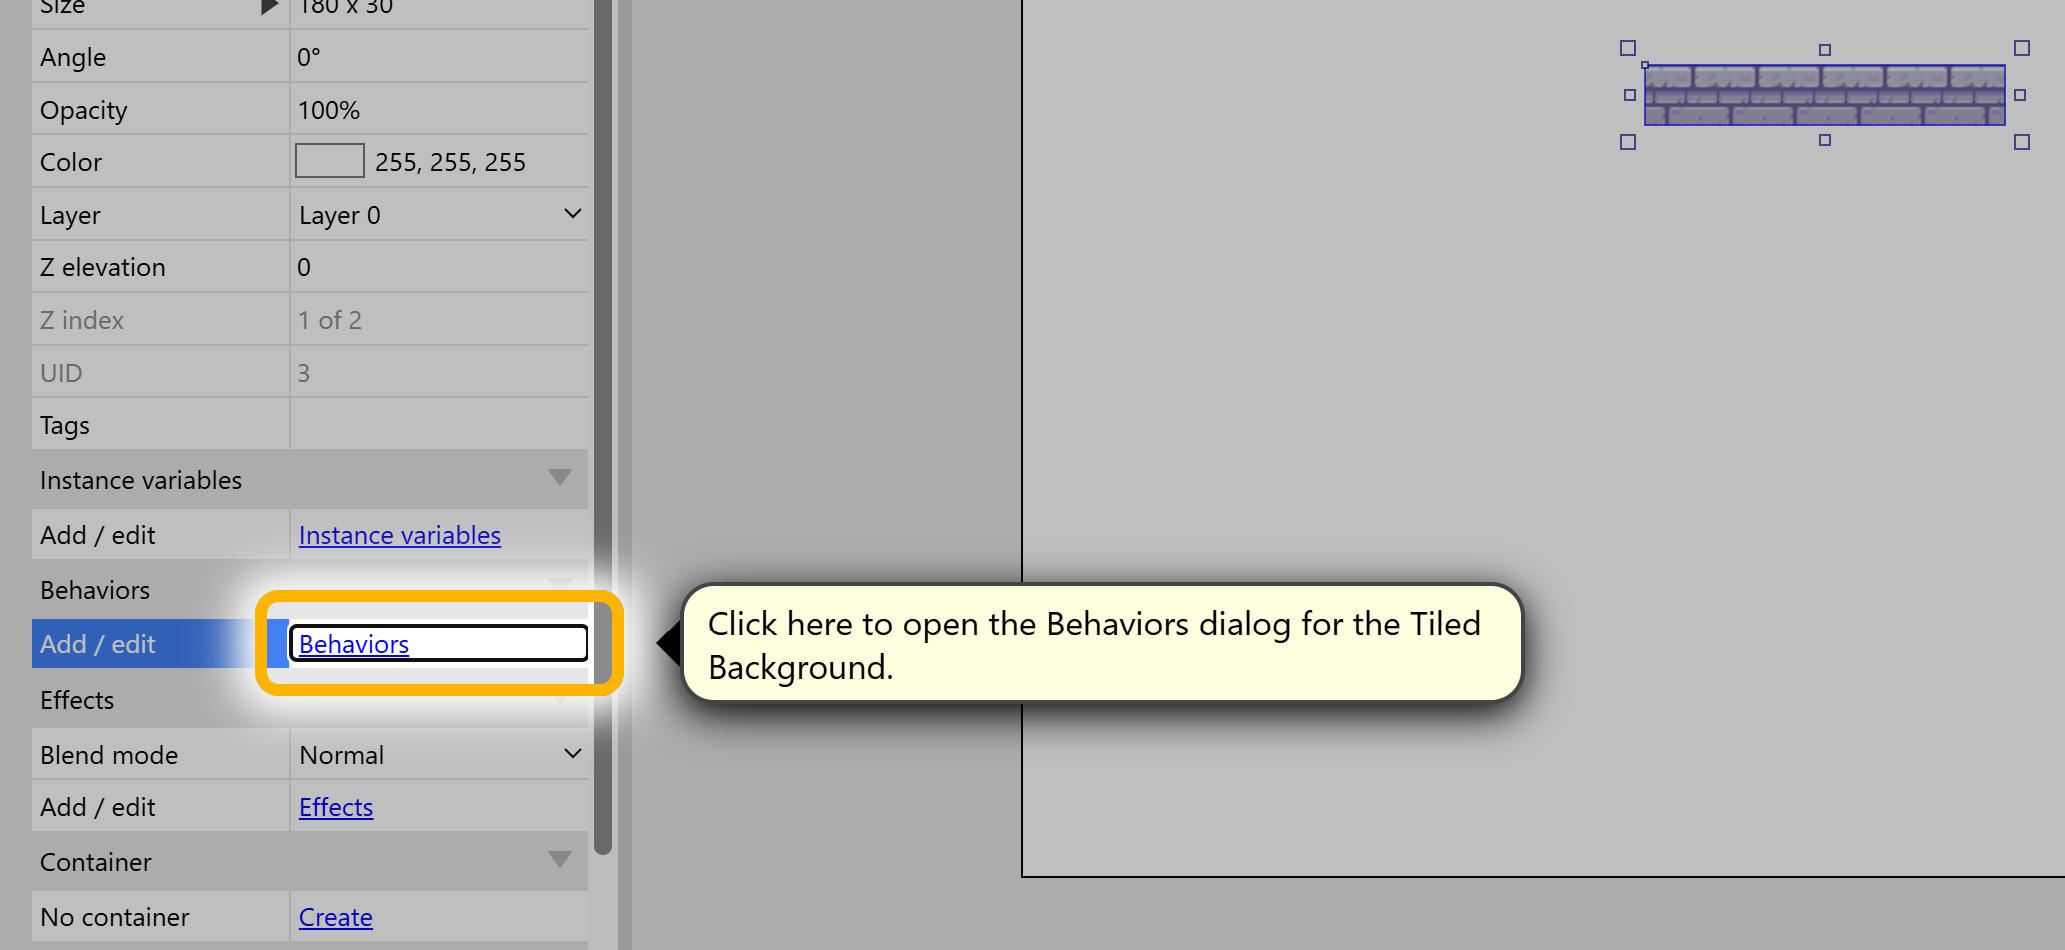
Step 4: Add Game Objects
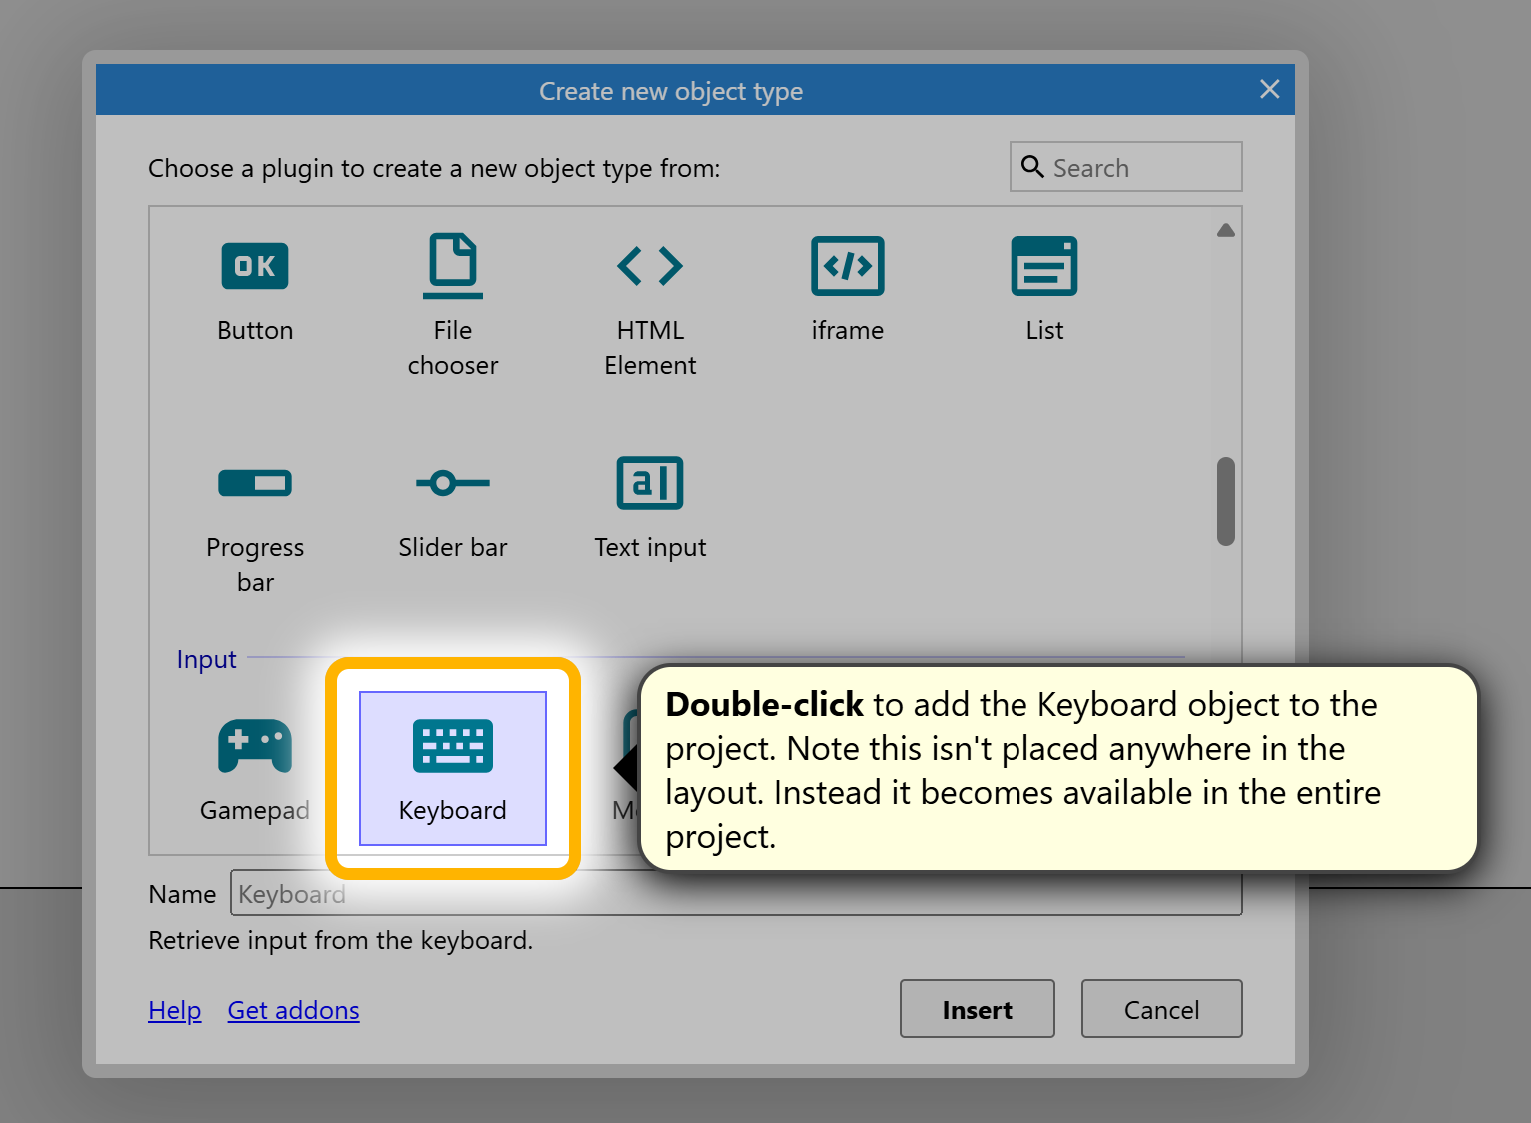
1. In the Layout View, right-click to insert a new object (like a sprite, text, button, etc.). 2. For example, to add a character, select “Sprite” and click on the layout to place it.
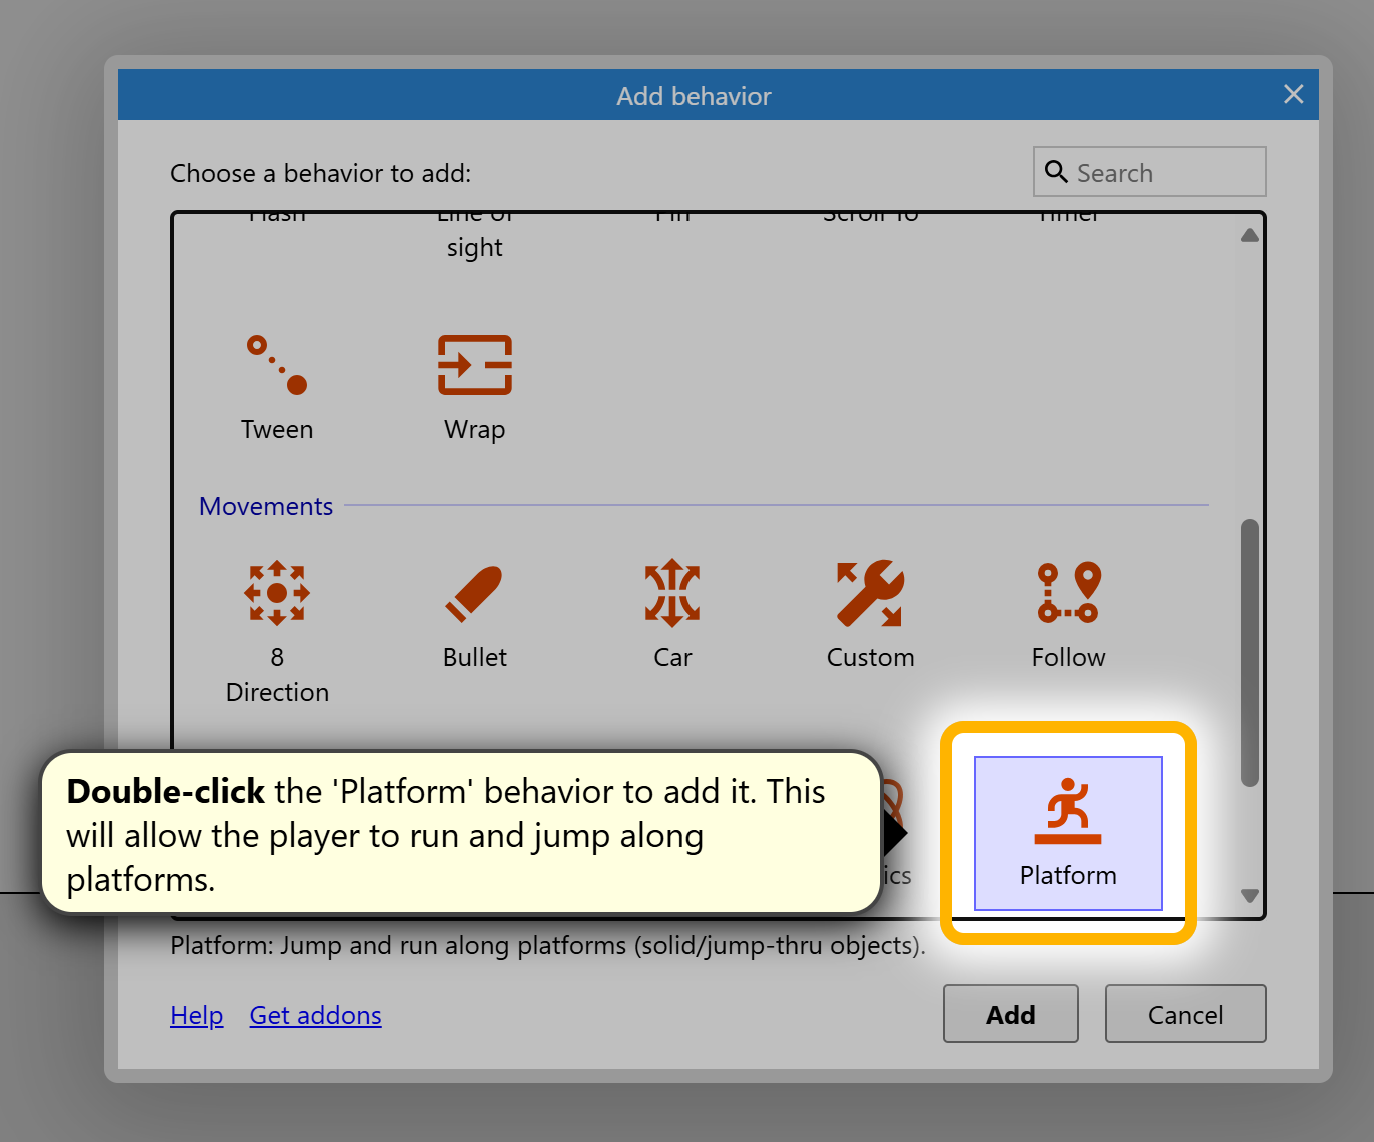
We also need to add a little feature to enable us to control our player
3. Choose an image for the sprite or draw your own. Adjust its size and position.
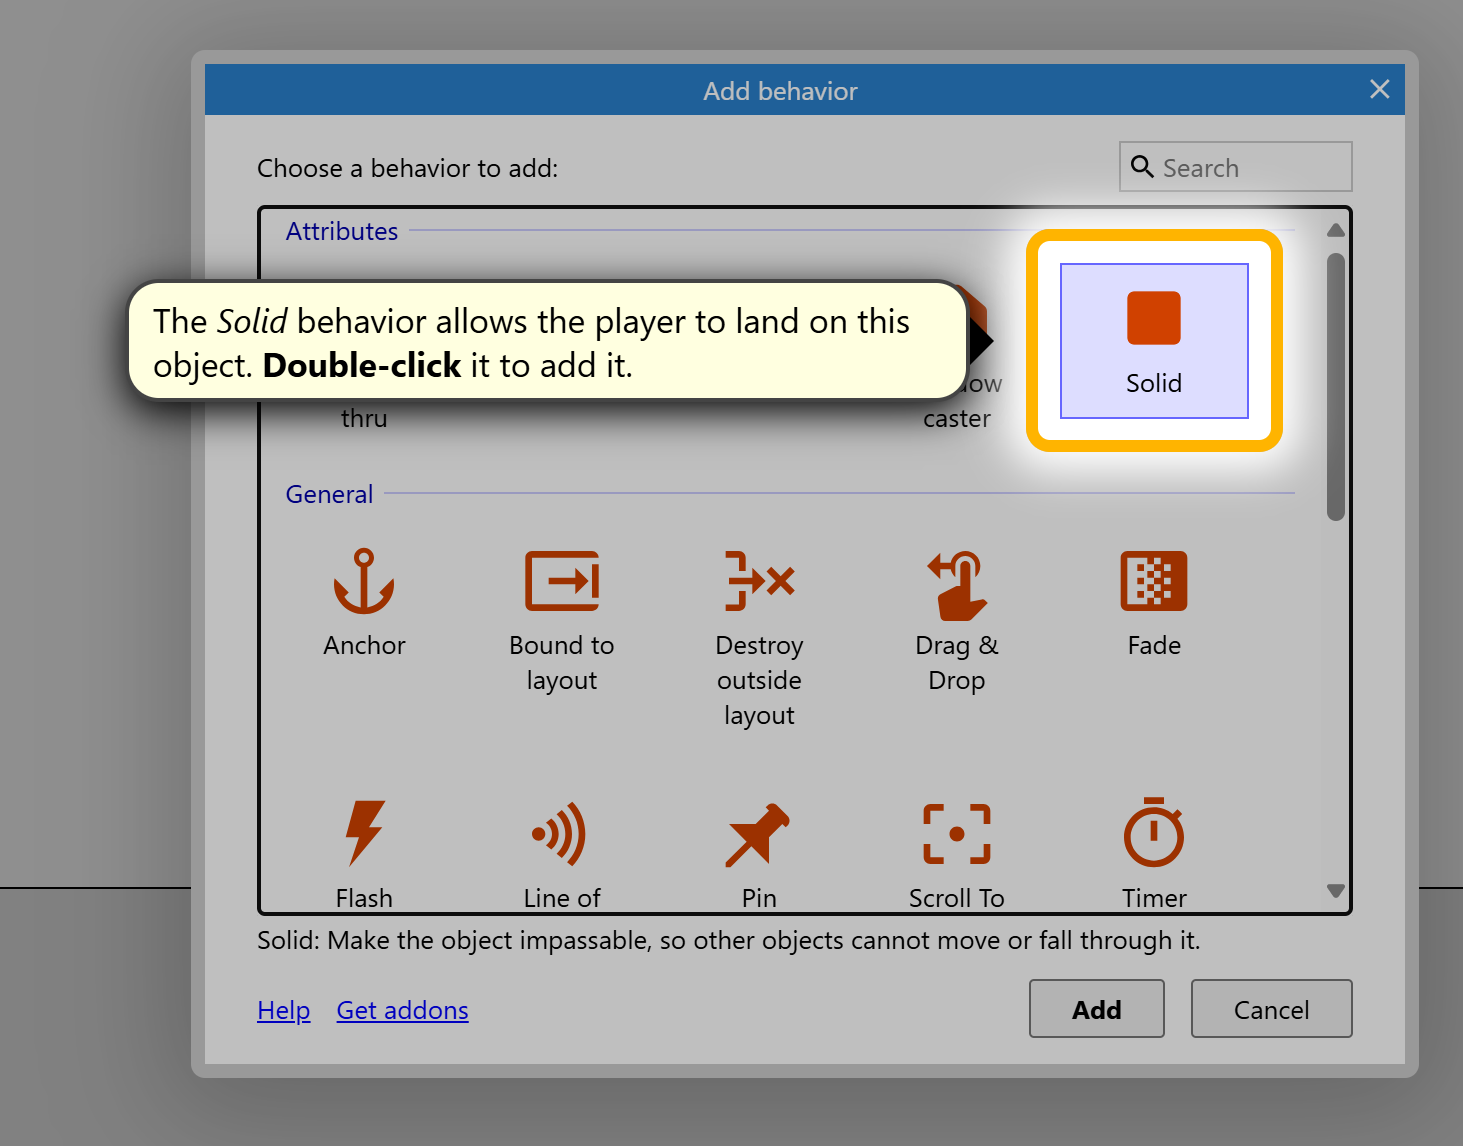
Step 5: Create Basic Events
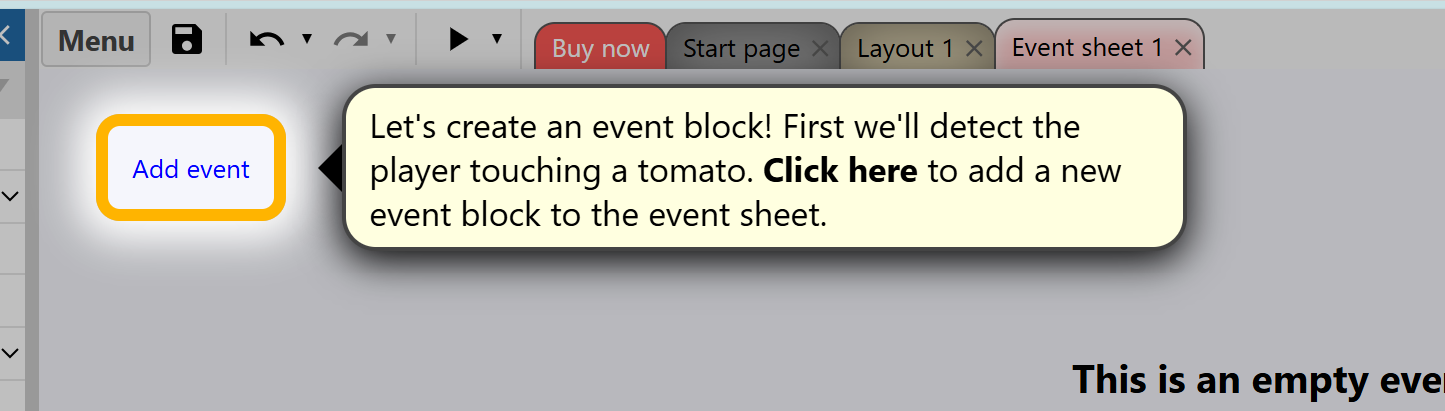
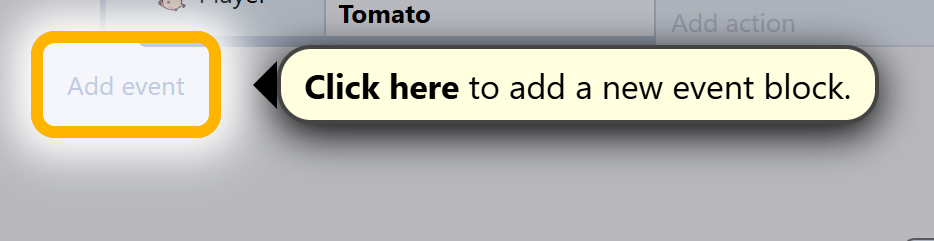
1. Go to the Event Sheet.
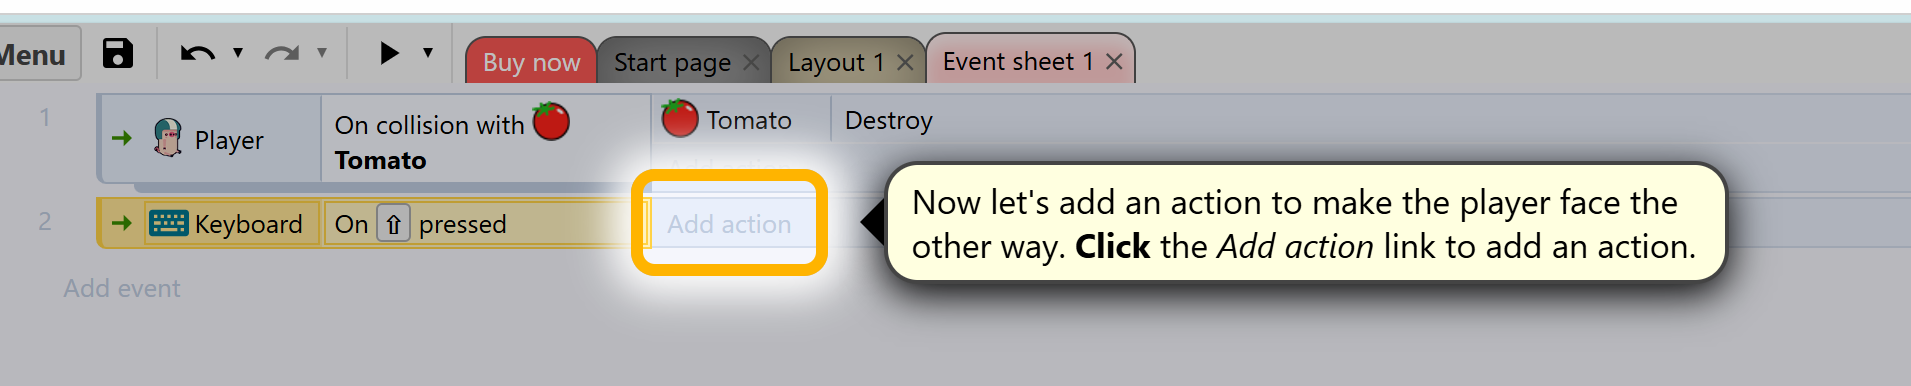
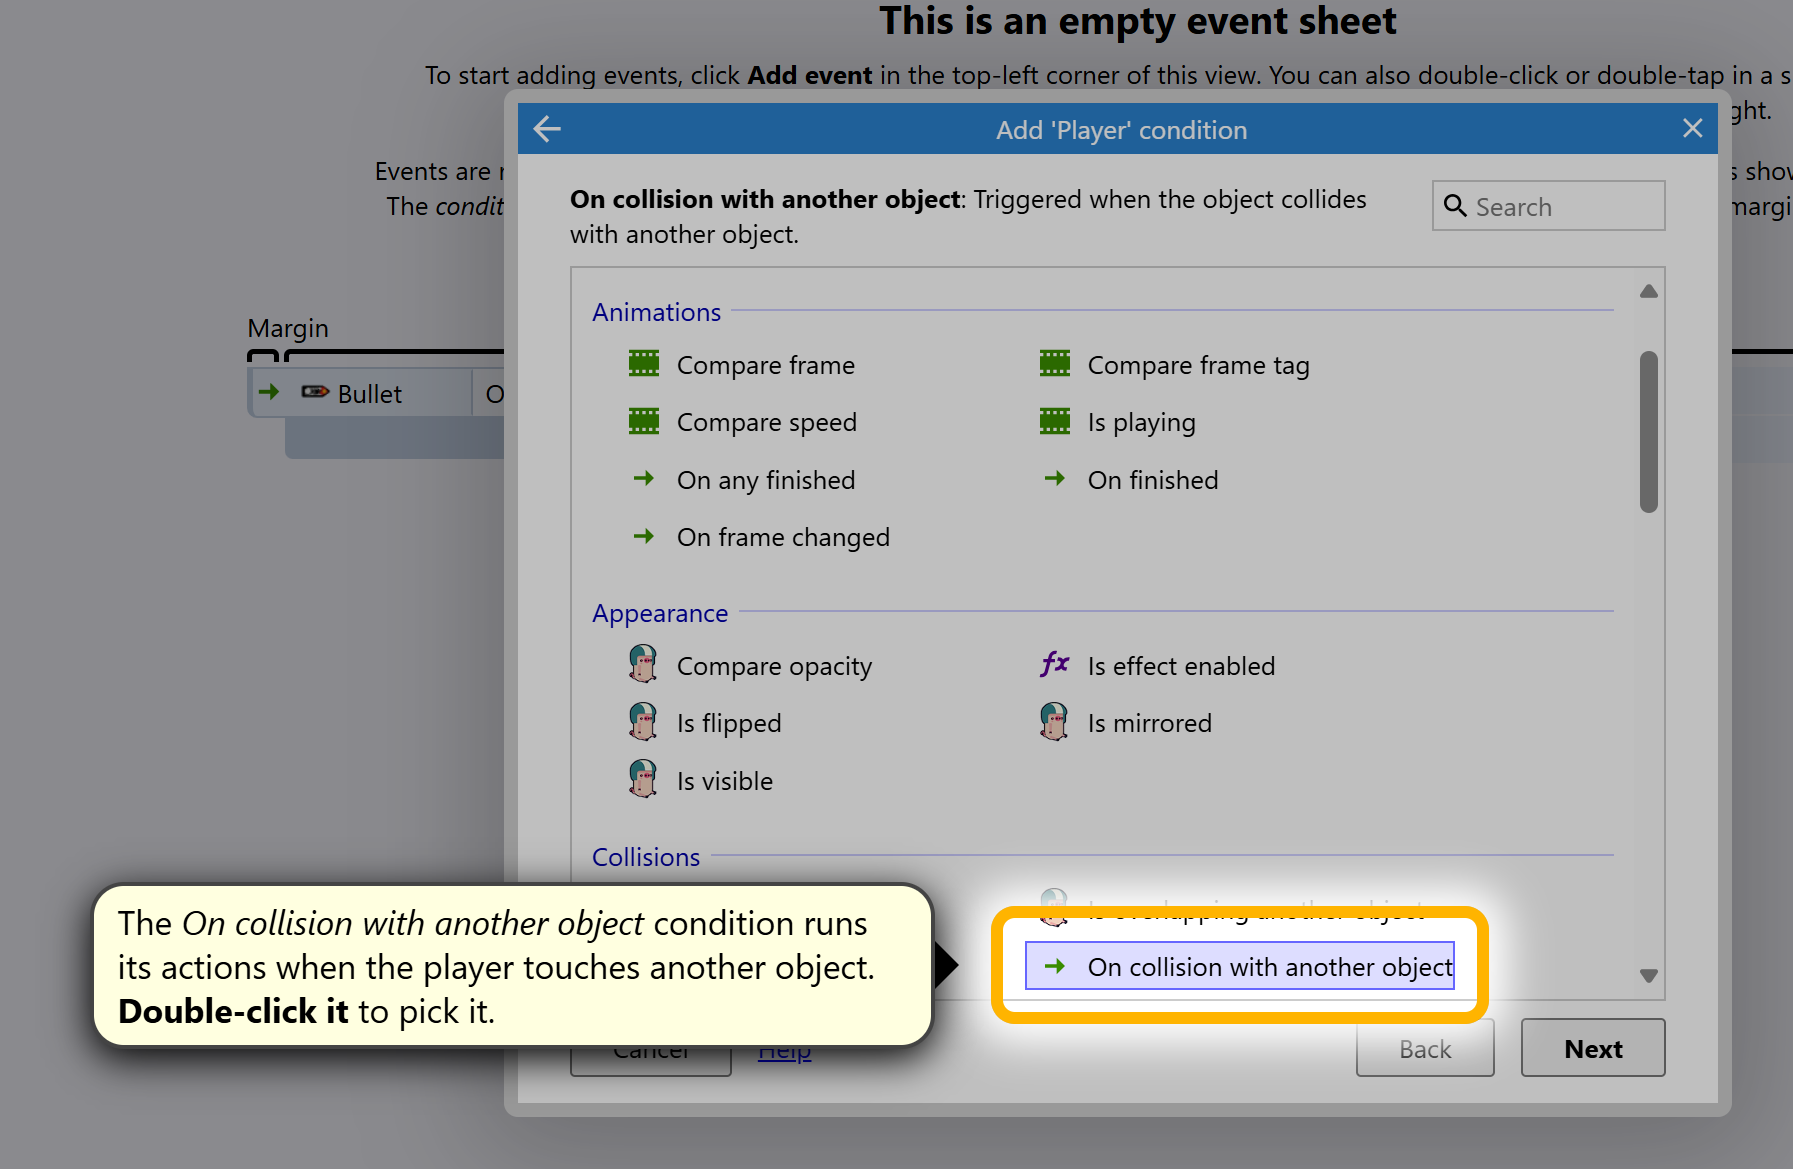
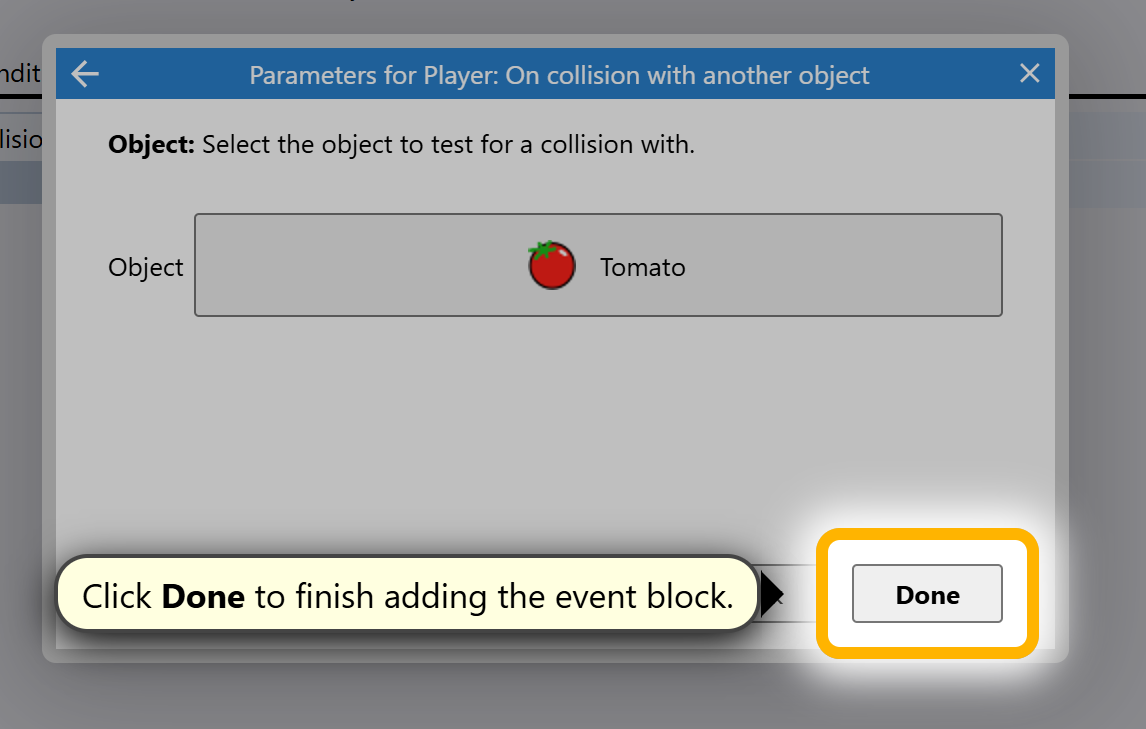
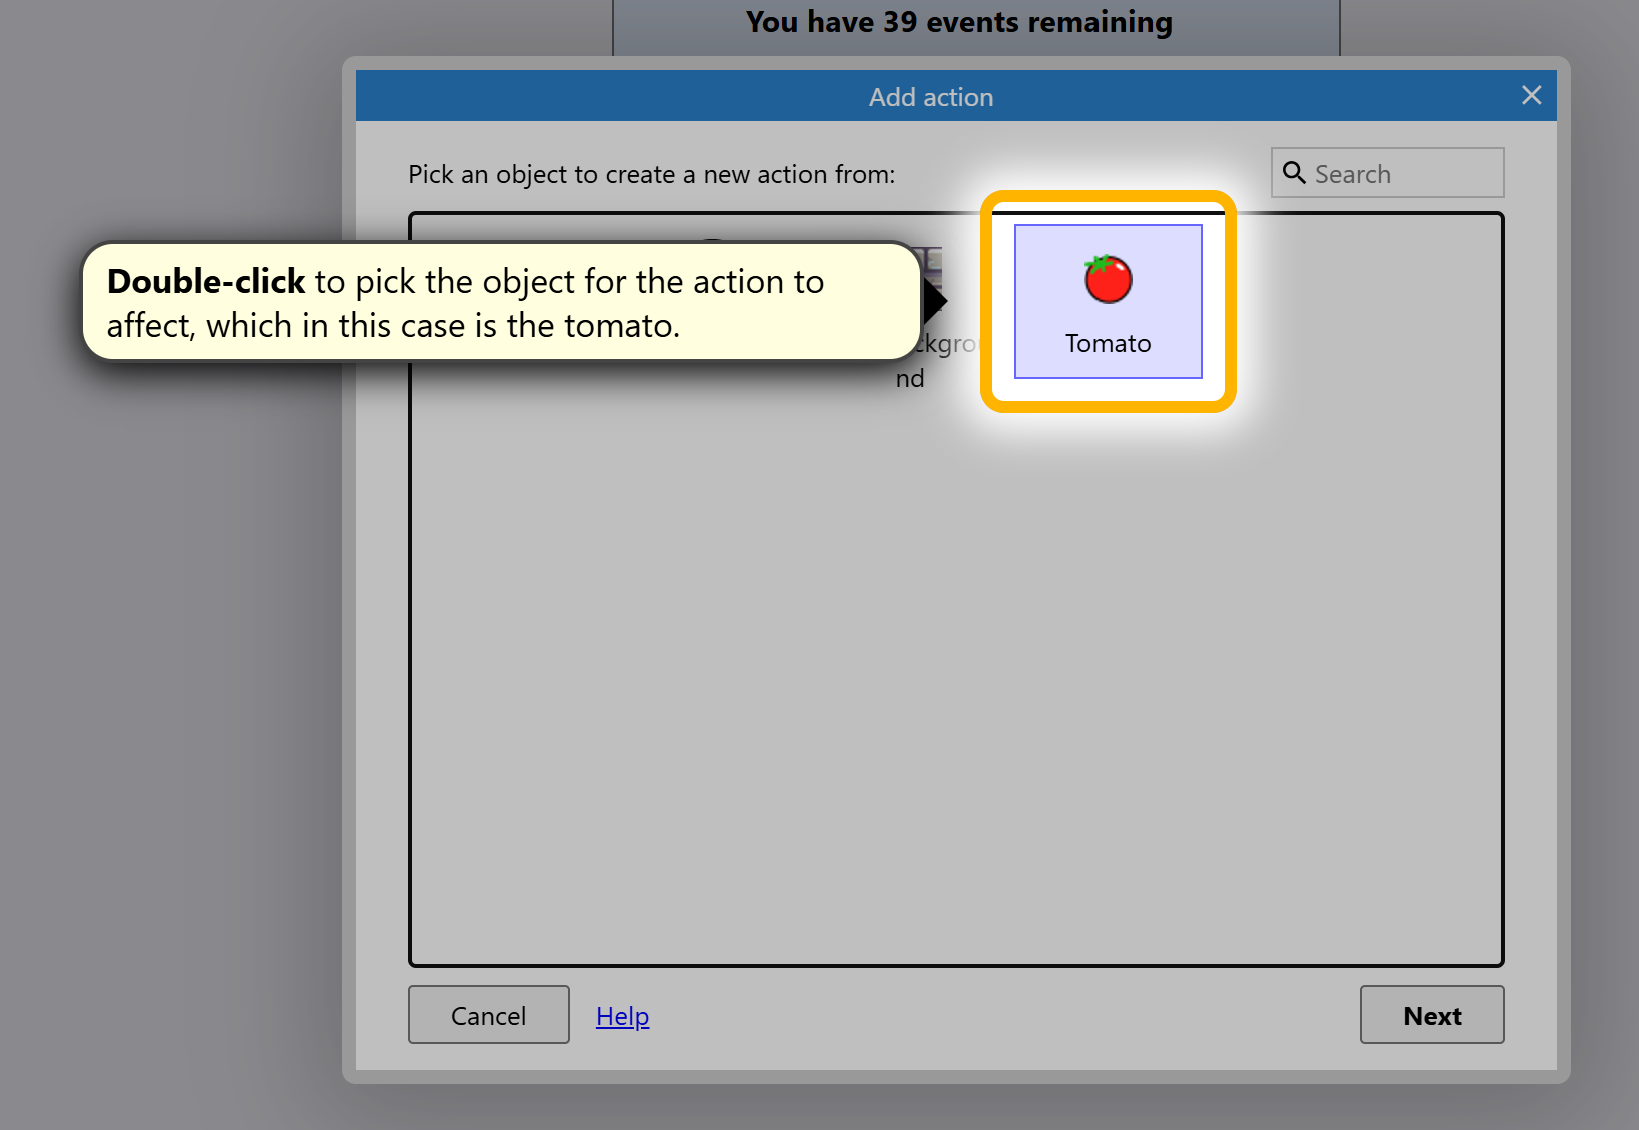
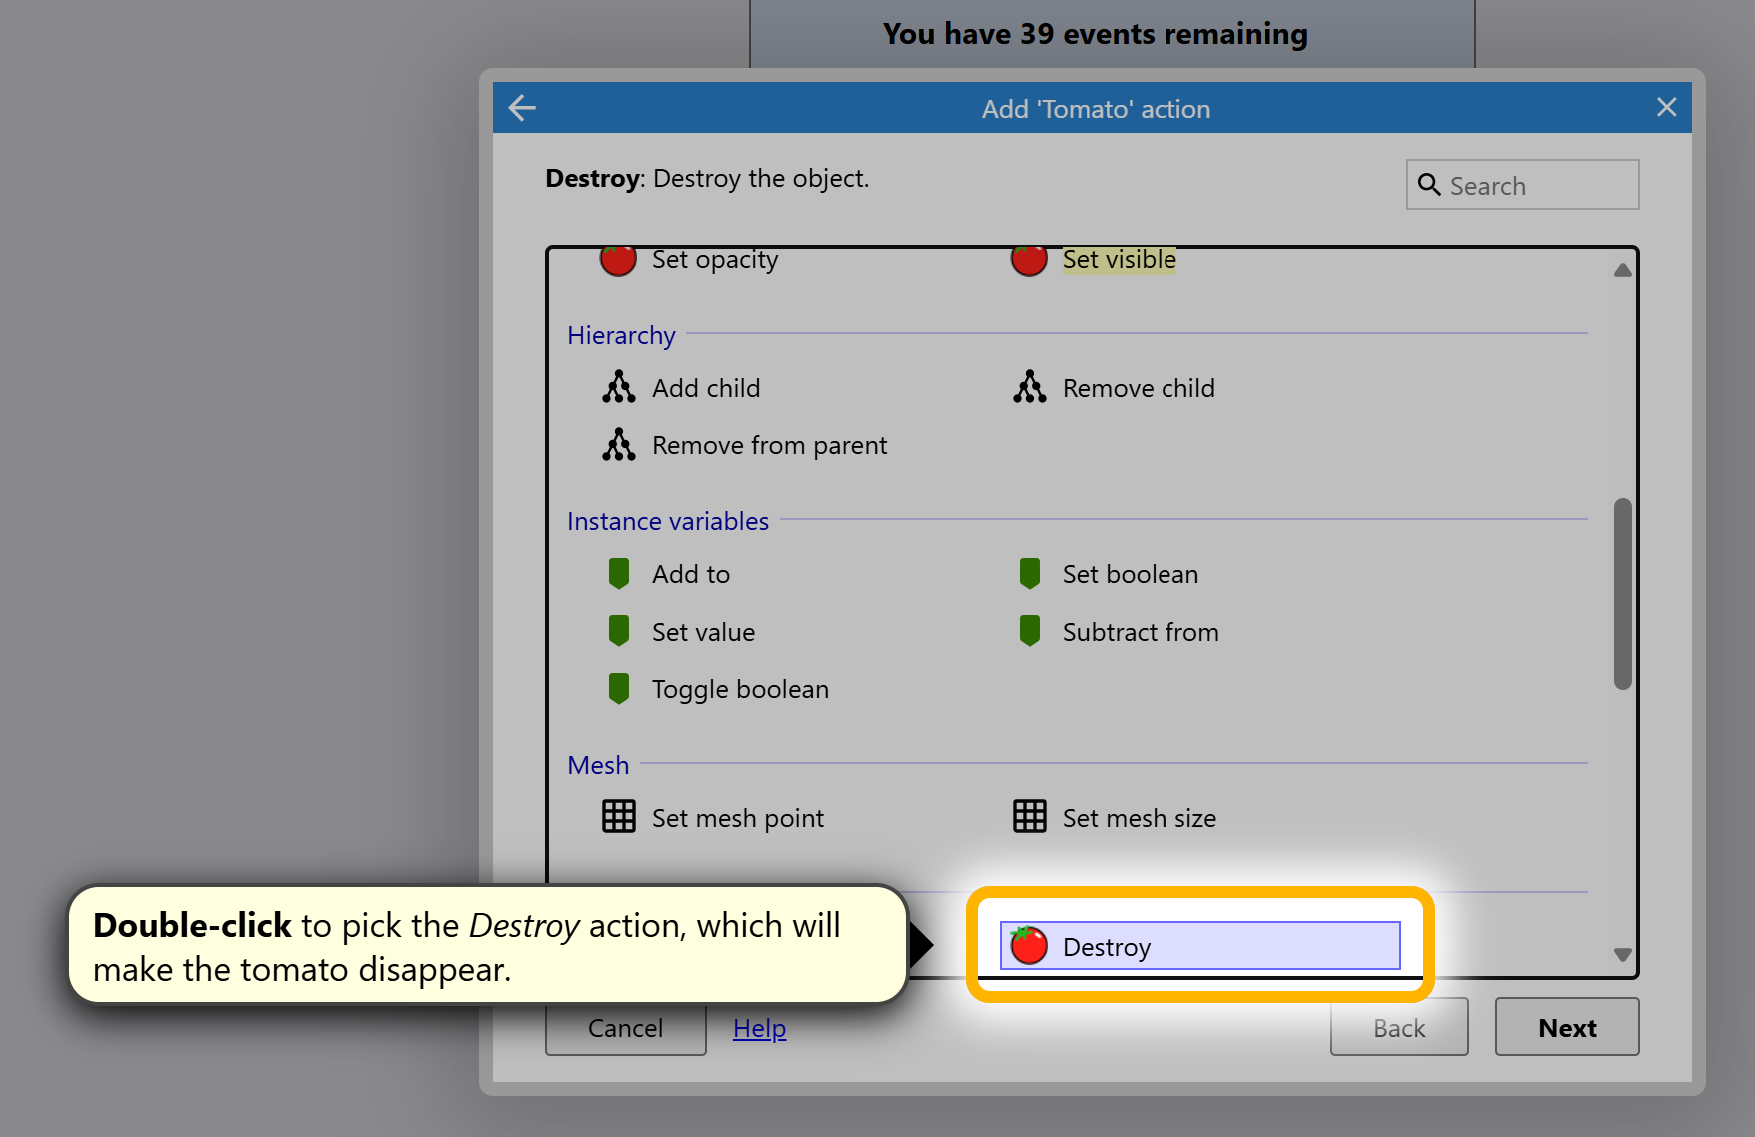
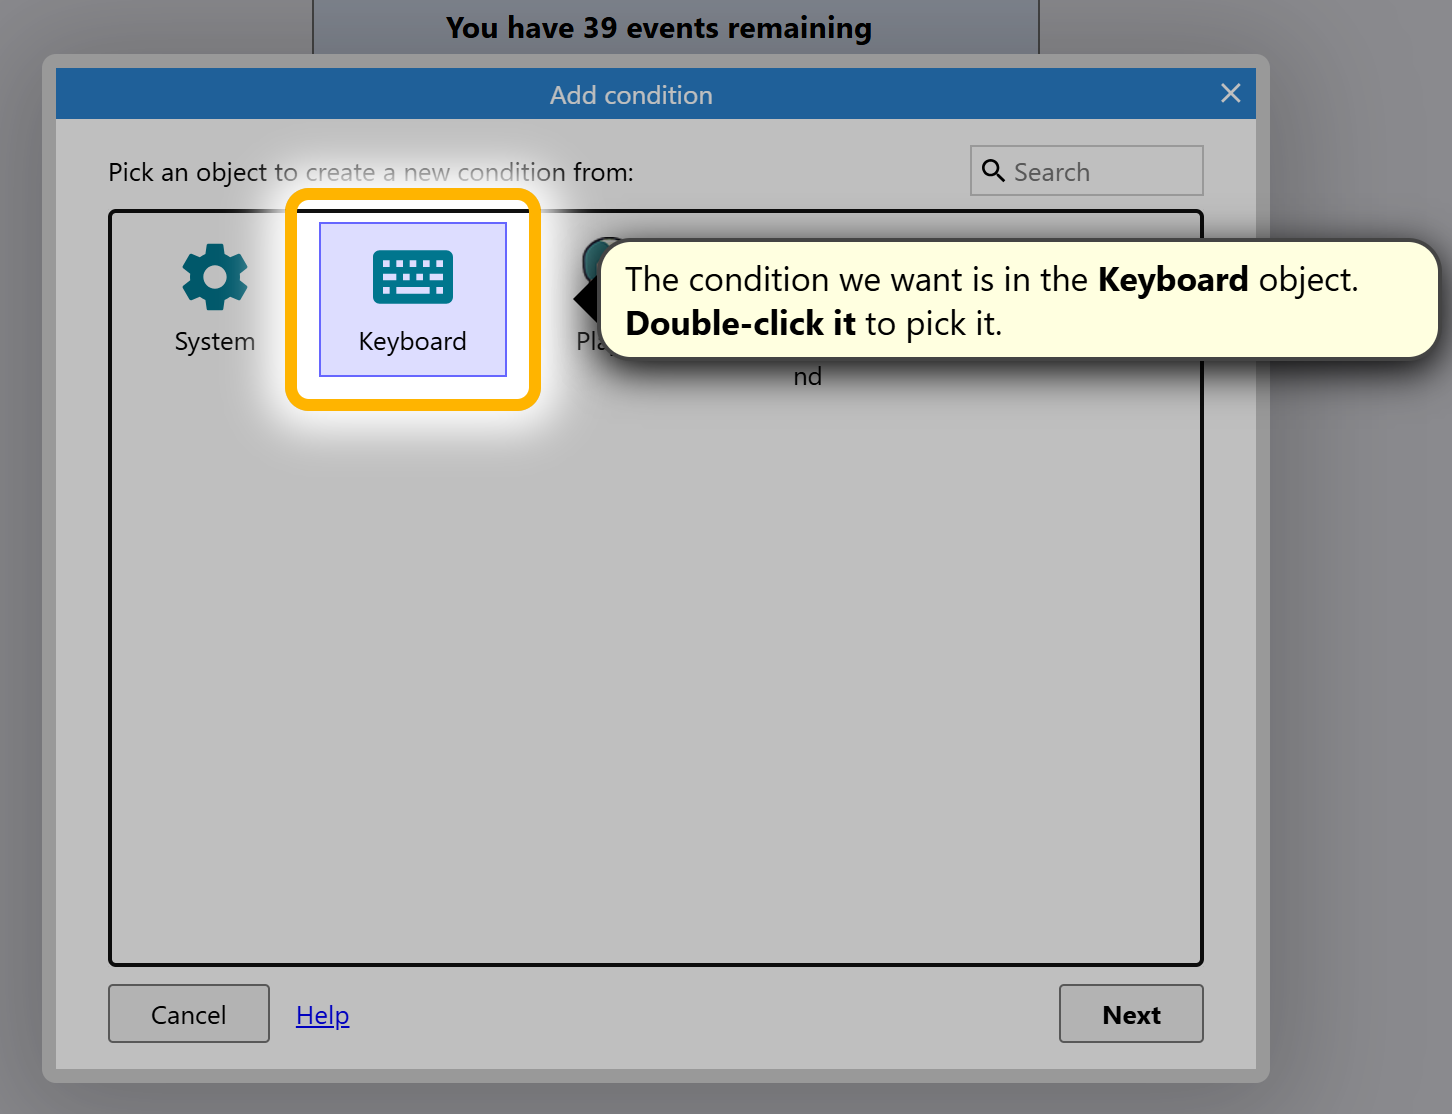
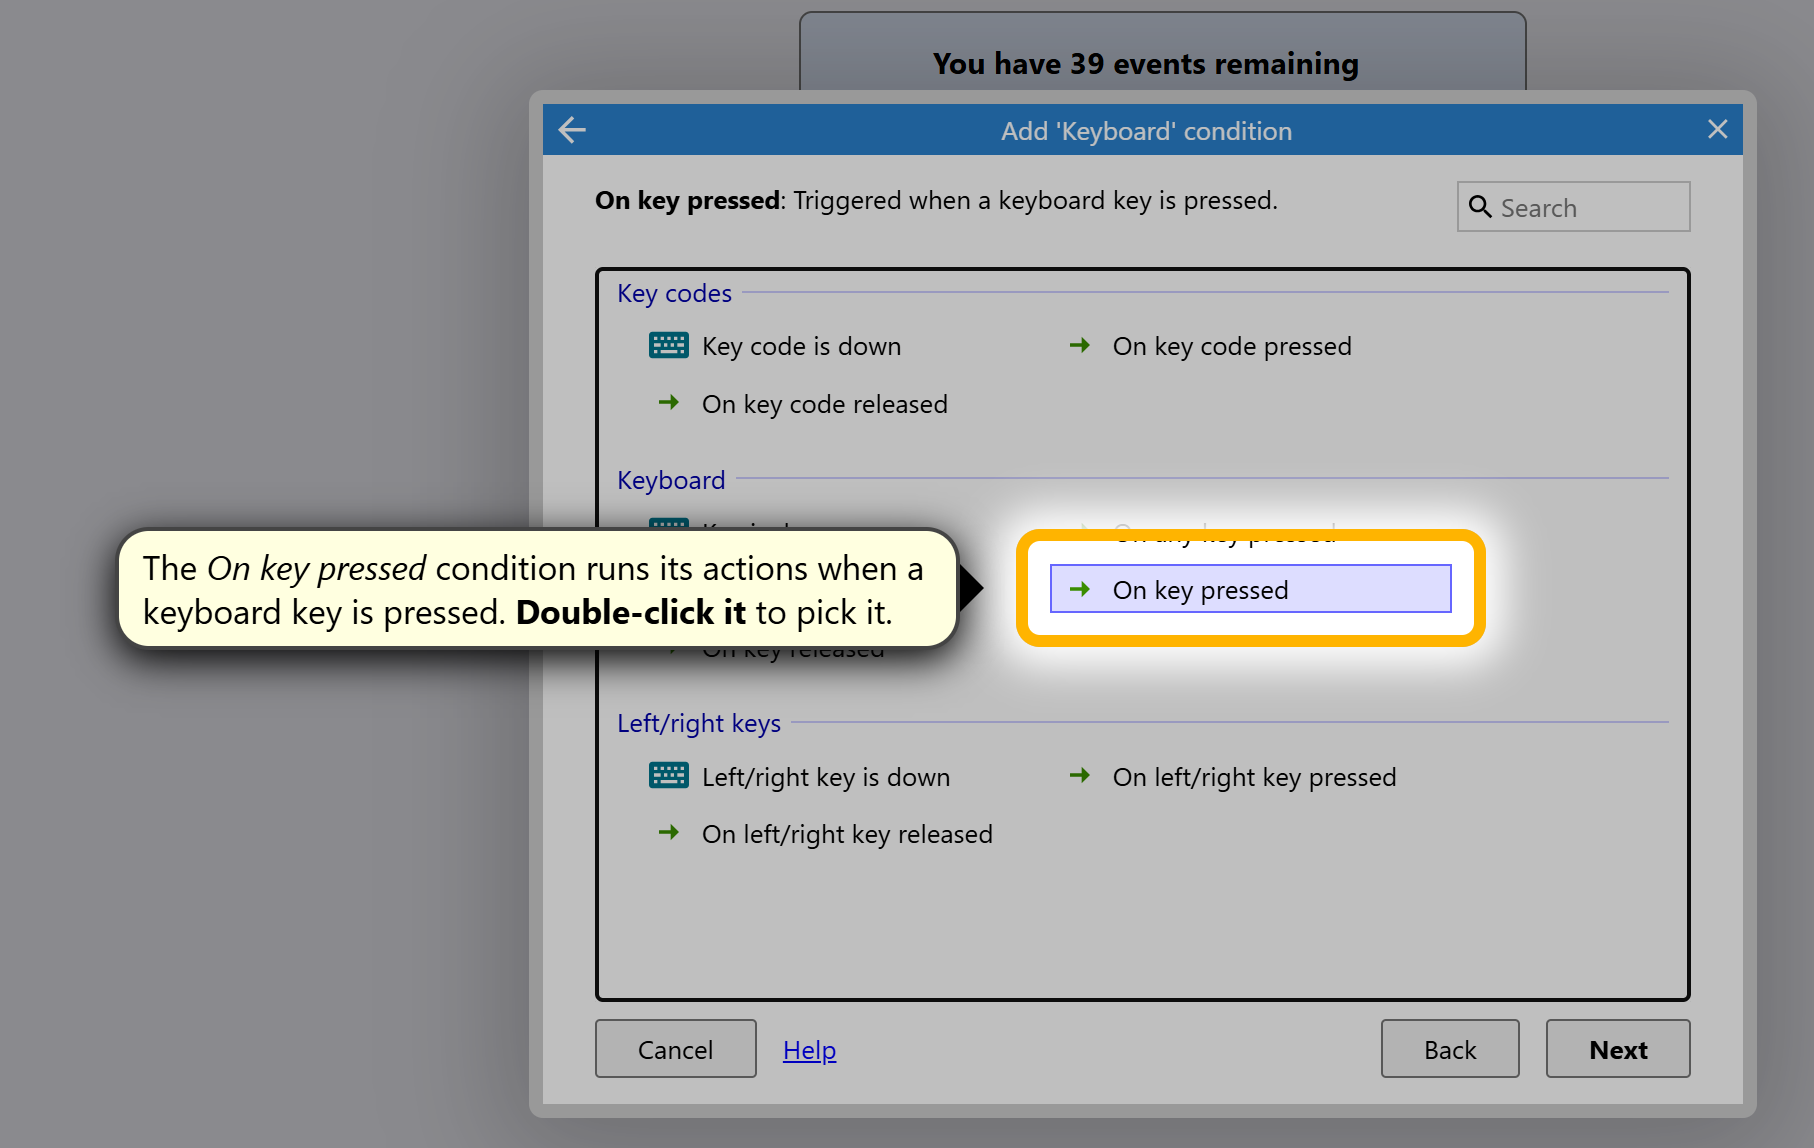
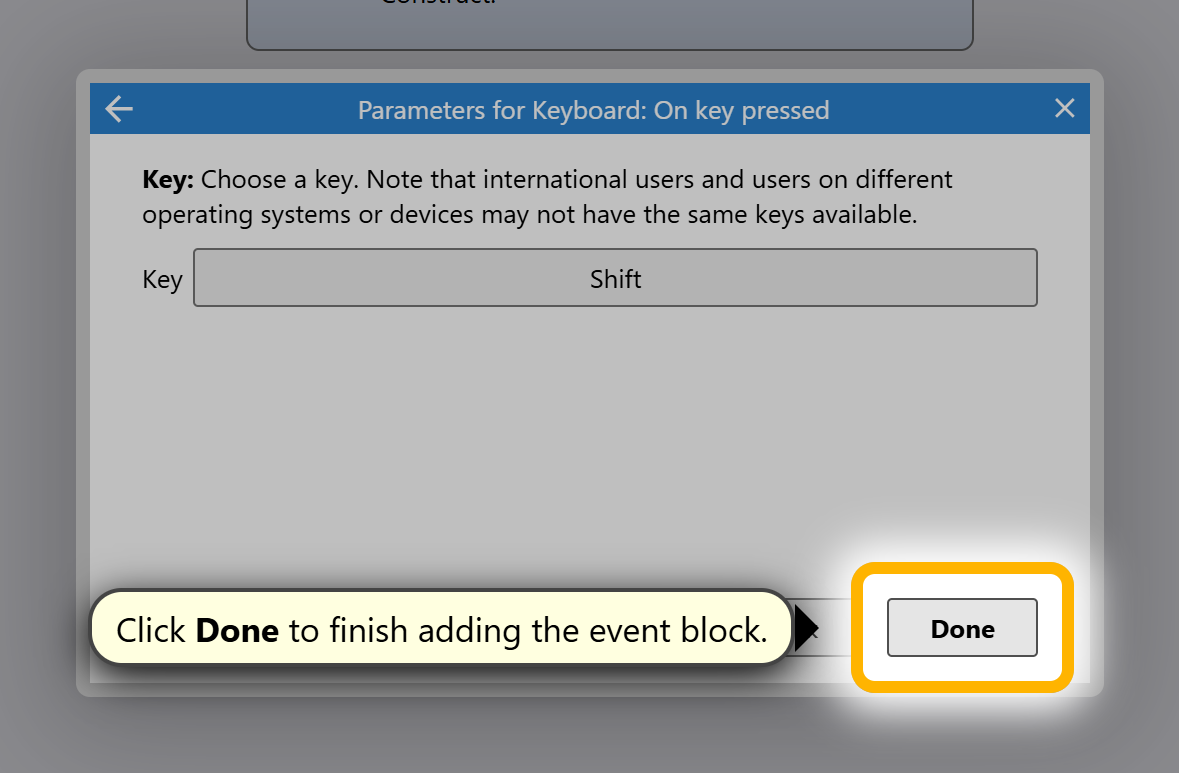
2. Click “Add Event” and set conditions (like “when player collides with an object”) and actions (like “destroy object” or “play sound”).
Now to make our player move in the direction we want them to go when pressing a direction button
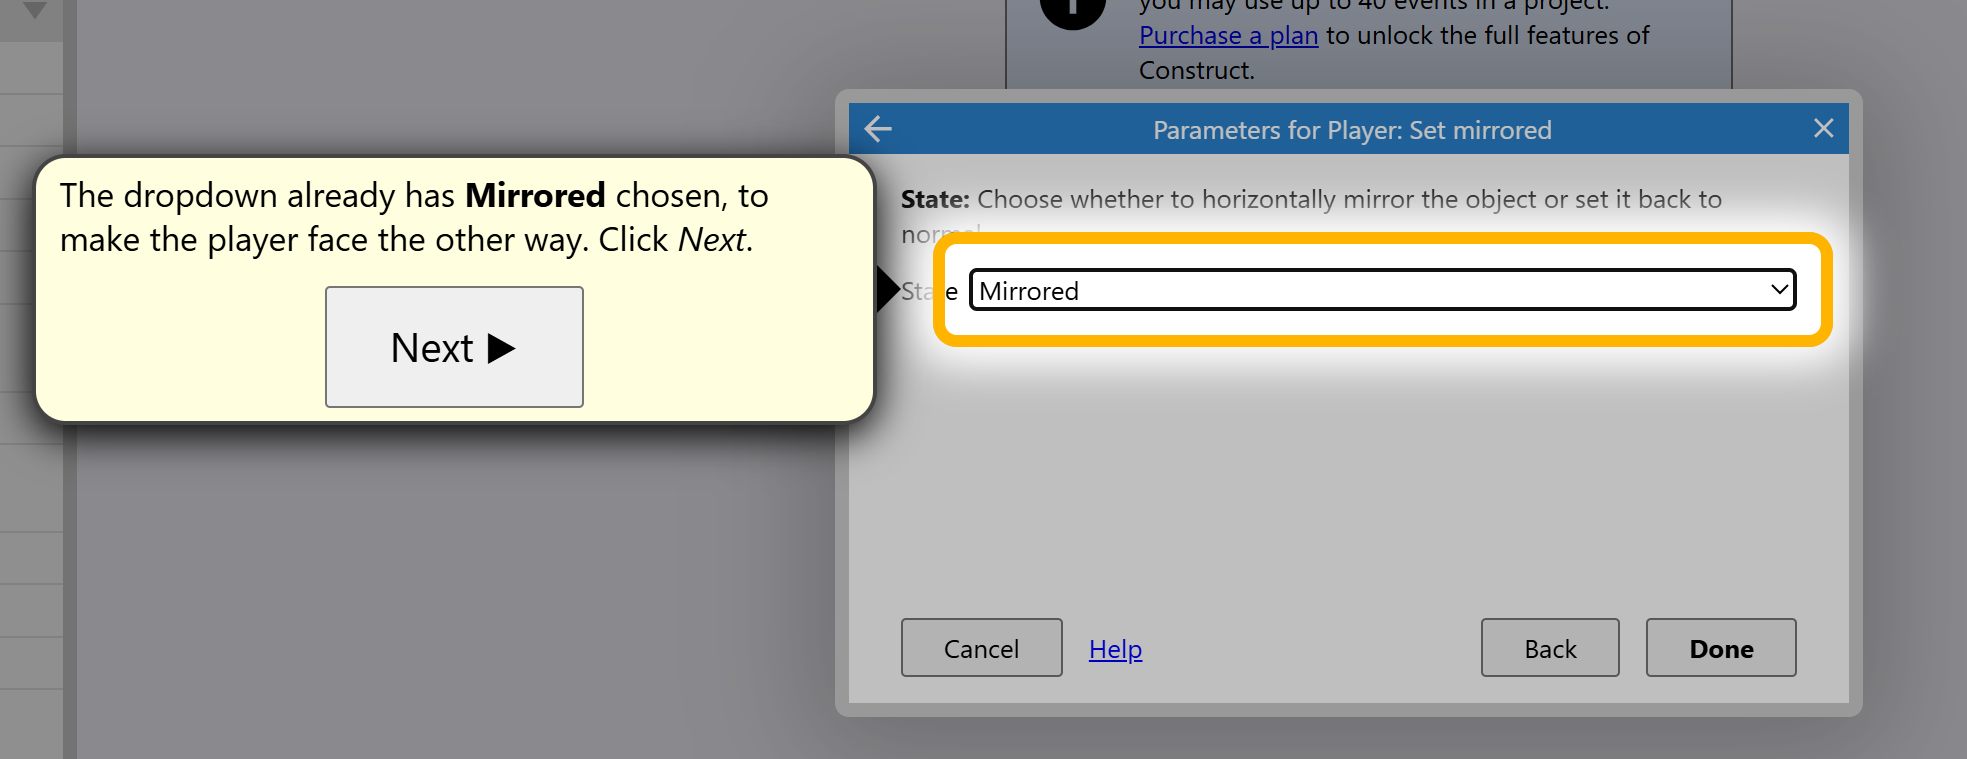
Follow the same process as covered above however this time use the other option for the mirroring.
3. Experiment with different events to add interactivity to your game.
Step 6: Test Your Game
1. Click the “Play” button in the toolbar to preview your game. 2. Test your gameplay and adjust as needed.
Step 7: Export Your Game
1. When you’re ready, go to Menu > Project > Export. 2. Choose an export option, such as HTML5, Android, or iOS, depending on where you want your game to be playable.
This should get you started with Construct 3! Let me know if you want to dive deeper into specific features or game mechanics. Files that support this week | English:
|
Assessment:
Anonymous Assessment - Learners assess an anonymous piece of work containing deliberate mistakes against given success criteria. Anonymous Assessment - Learners assess an anonymous piece of work containing deliberate mistakes against given success criteria. |
Learning Outcomes:
|
Awarding Organisation Criteria:
|
| Maths:
|
|||||
| Stretch and Challenge:
|
E&D / BV | ||||
| Homework / Extension:
|
ILT | ||||
| → | → | → | → | → | → |
| Week 6 | T&L Activities: | English:
|
Assessment:
Anonymous Assessment - Learners assess an anonymous piece of work containing deliberate mistakes against given success criteria. Anonymous Assessment - Learners assess an anonymous piece of work containing deliberate mistakes against given success criteria. |
Learning Outcomes:
|
Awarding Organisation Criteria:
|
| Maths:
|
|||||
| Stretch and Challenge:
|
E&D / BV | ||||
| Homework / Extension:
|
ILT | ||||
| → | → | → | → | → | → |

.png)


.png)


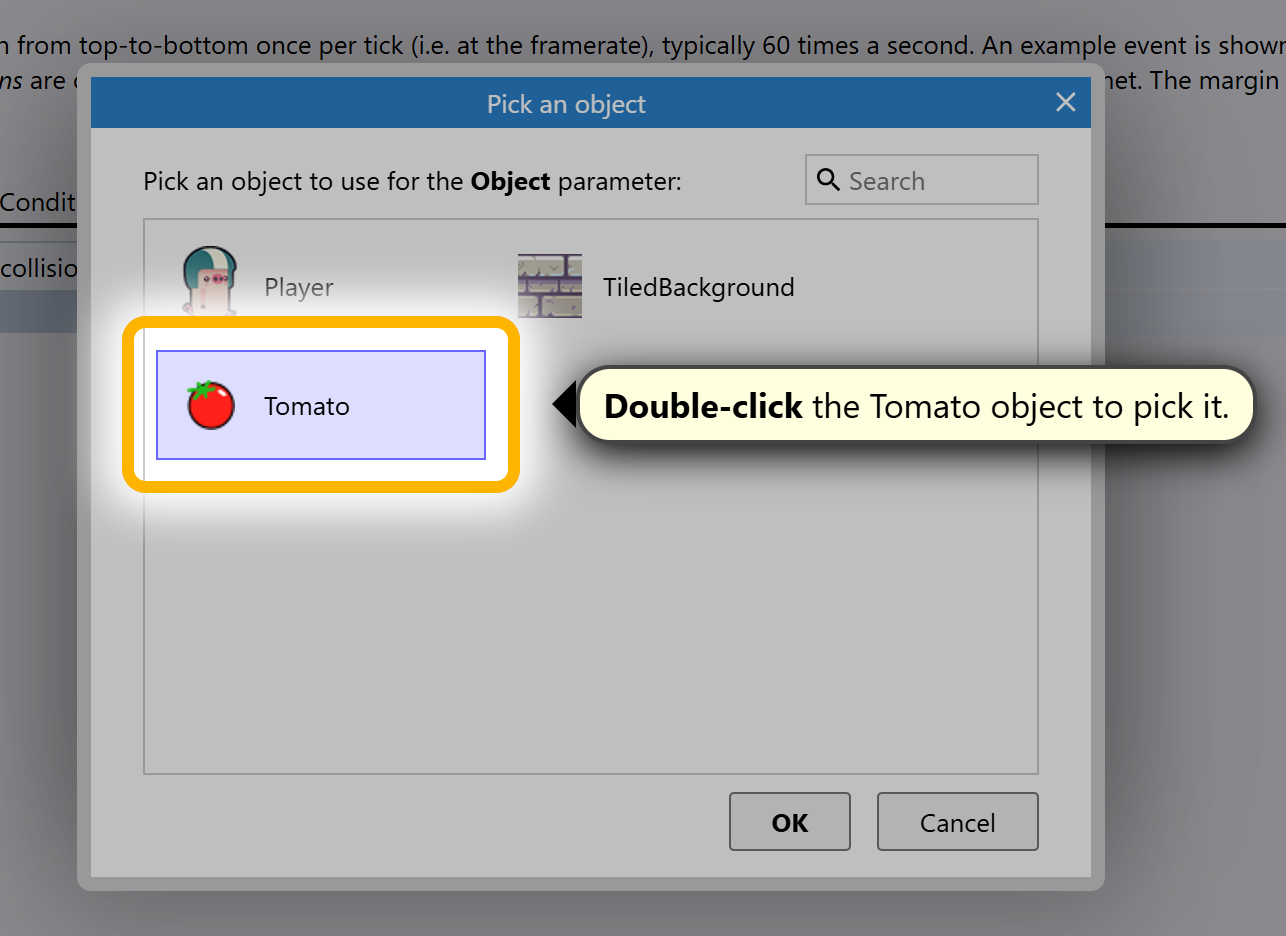
 Let's make a collectable
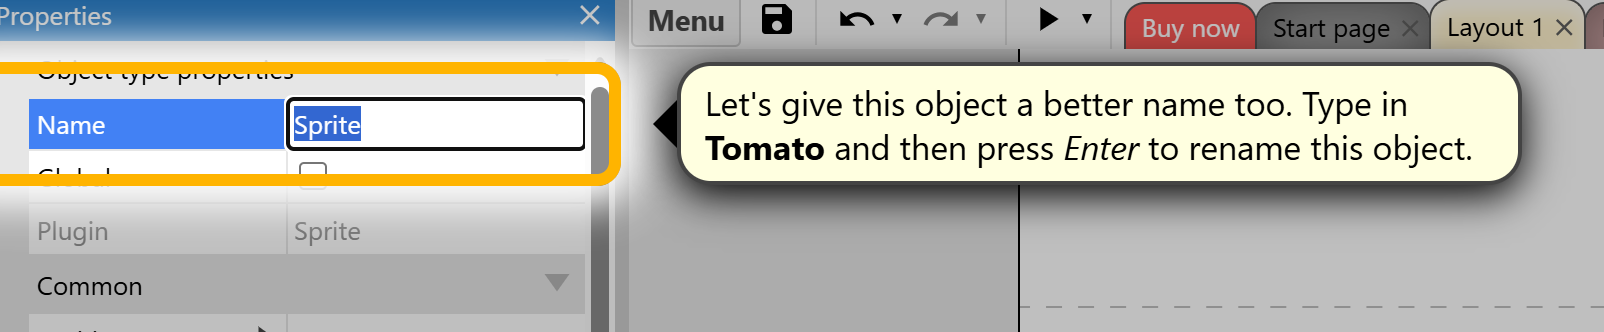


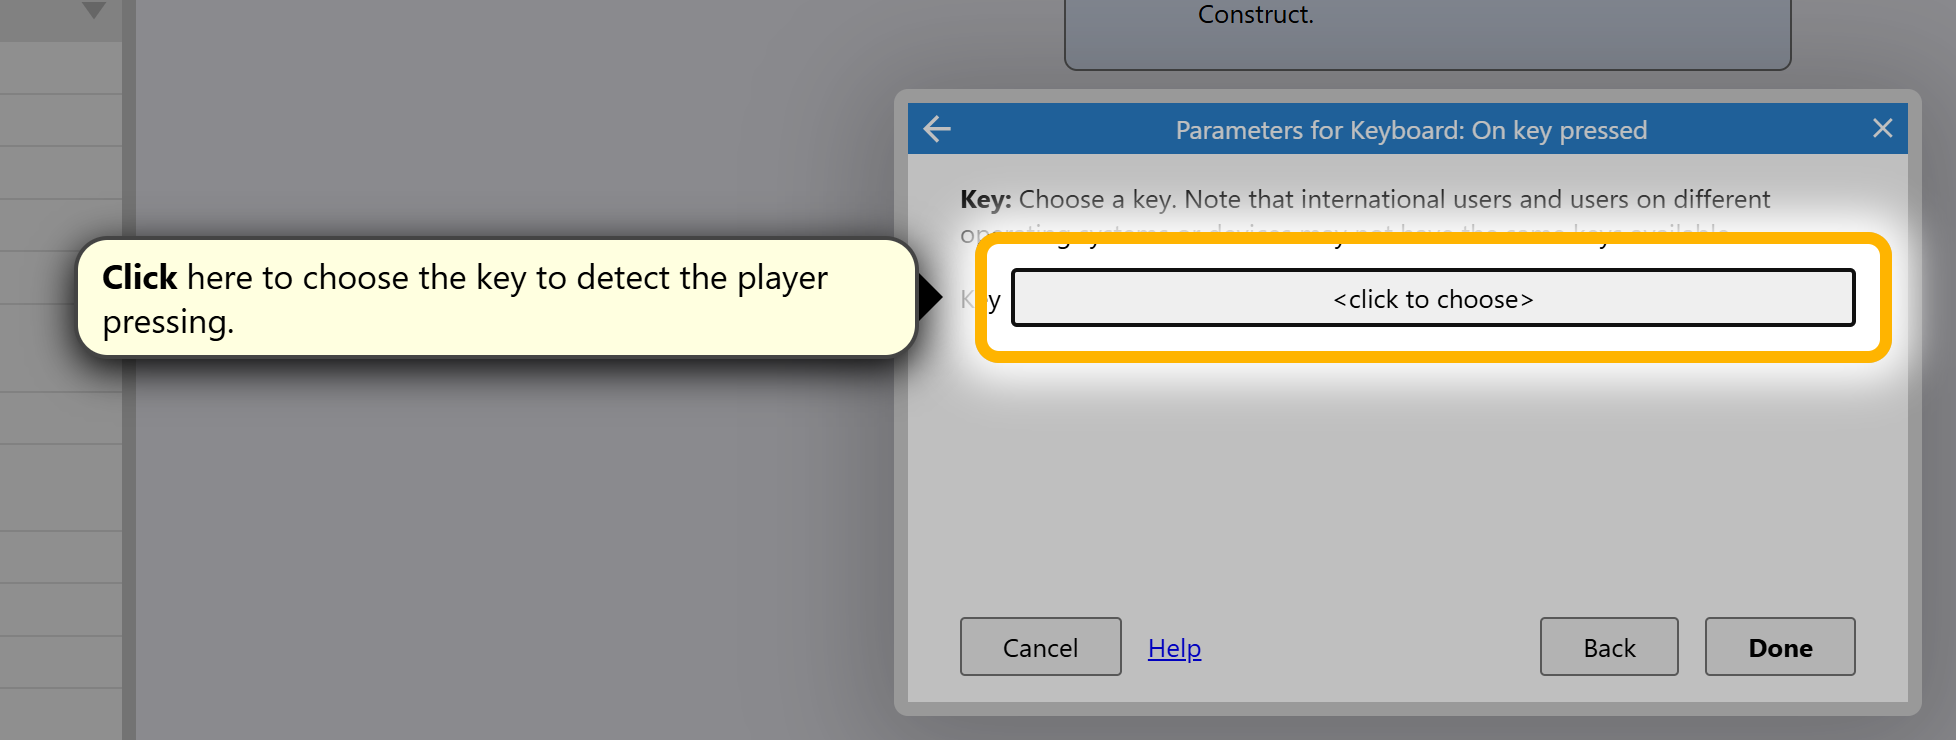 Select the key that you would like to attach to the movement.
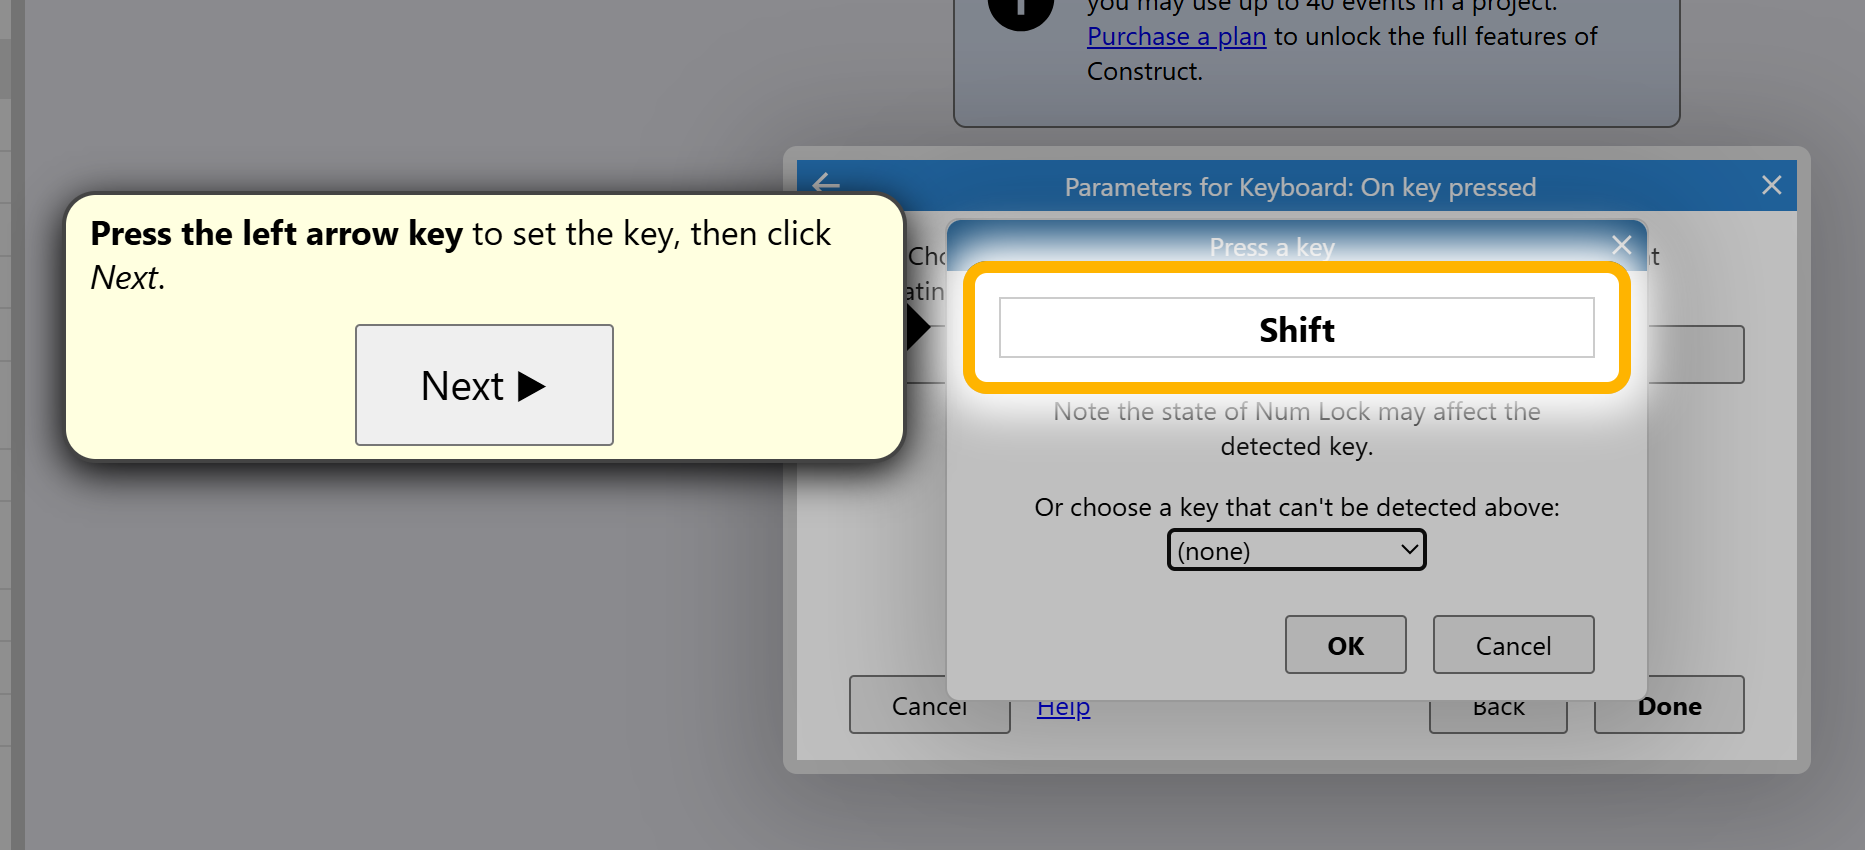
.png)
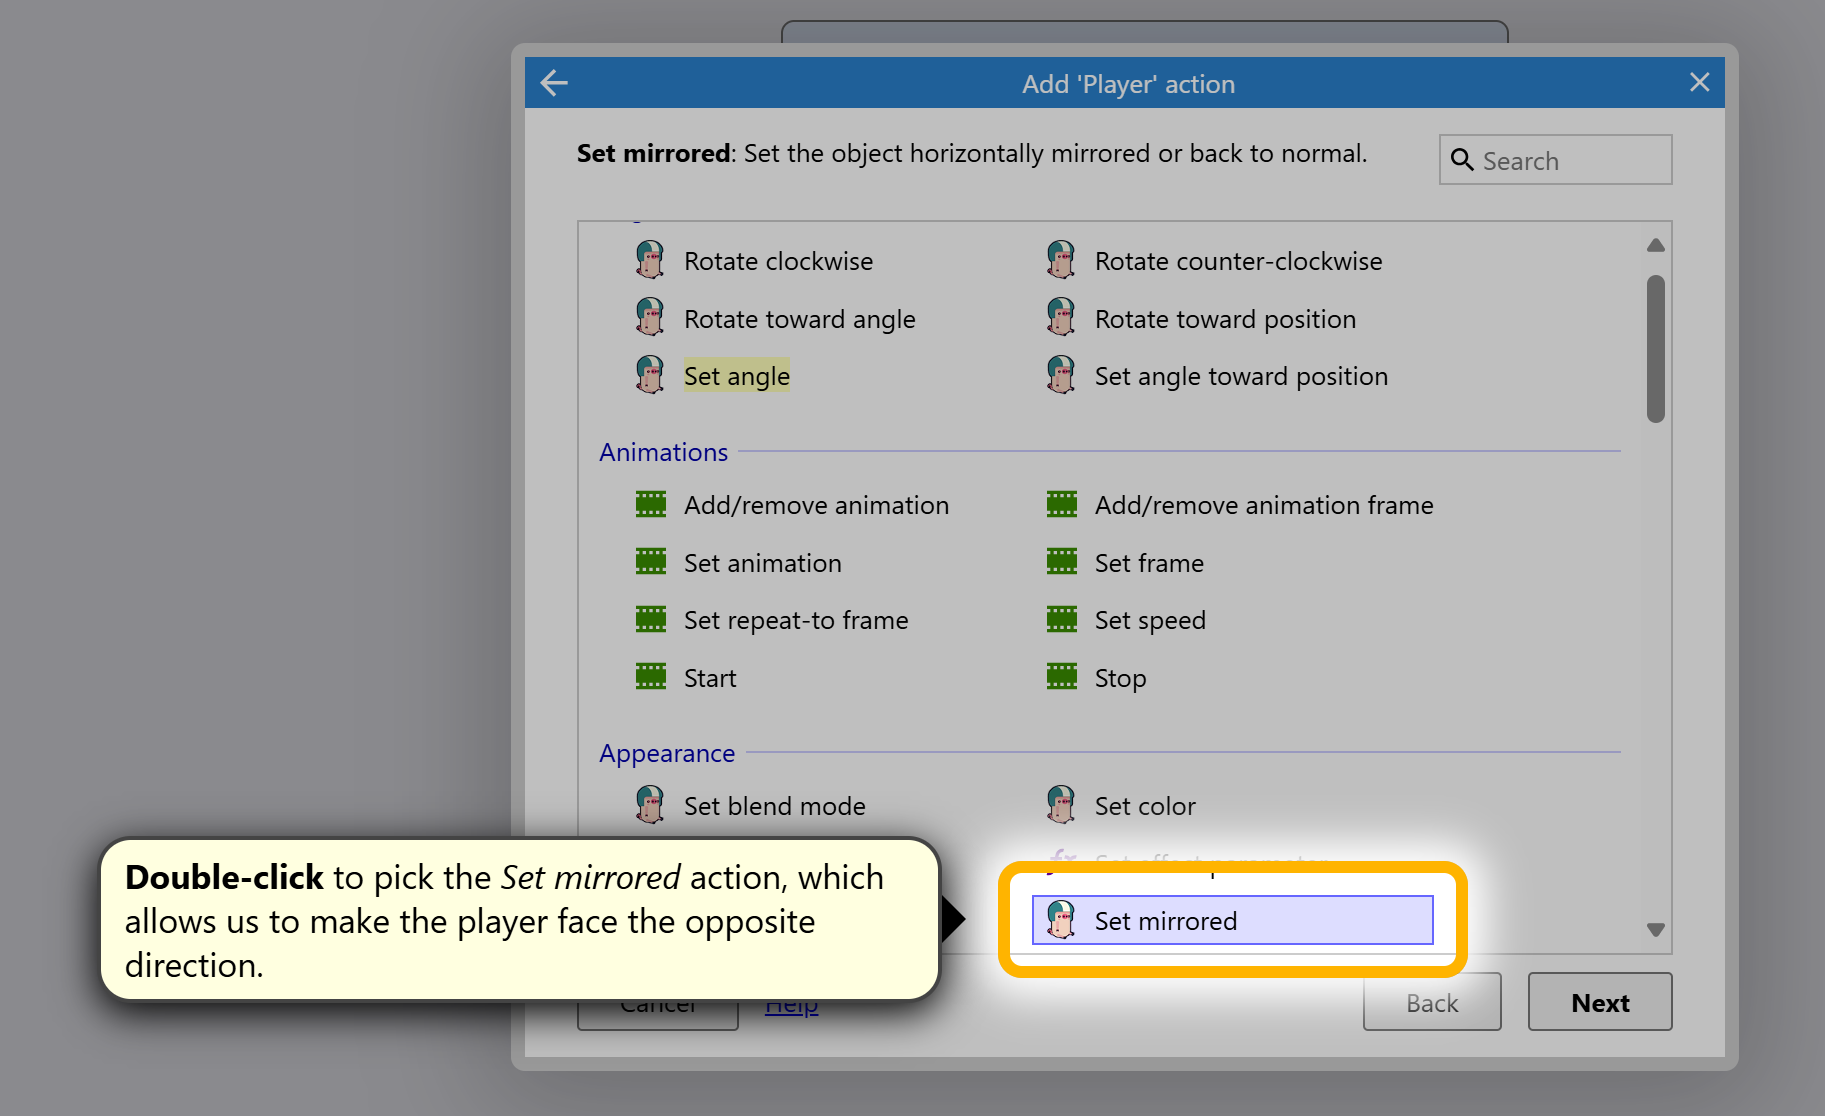
 Now to make our player face the direction we want them to go when pressing a direction button