week 4
B2 Designing a mobile app
Producing appropriate design documentation for a mobile app to meet identified requirements is key to its overall success as it allows developers, be them as an individual or as a team to organise and position their thoughts about the app and the direction that they wish to take.
Where a team is involved the documentation allows for the team to clearly know the plans but also for them to share ideas, discuss and identify potential issues and problems in the initial stages and at given times along the development process.
Within the document the following are identified.
• User requirements.
What it is that the client would like to have accomplished by the app.
• A proposed solution:
o description of program tasks
o target platform(s)
o screen layouts and navigation
o algorithms, e.g. pseudo-code, activity diagrams
o control structures
o data validation
o integration of device capabilities, i.e. how, when and where device capabilities will be utilised.
• Alternative solutions.
• Details of resources and assets to be used:
o predefined code
o video, graphical, audio.
• Test and review schedule.
• Constraints, e.g. time, phone permissions, phone capabilities, limitation of platform.
• Legal and ethical considerations applicable to the equivalent legislation in England, Wales and Northern Ireland, e.g. privacy, security, use of content created by others.
Code Time
In this session of code time we will be looking at how we create buttons in our app that once clicked run/trigger an event to happen. We will be looking at "Intents".
Our objectives will be to have the following;
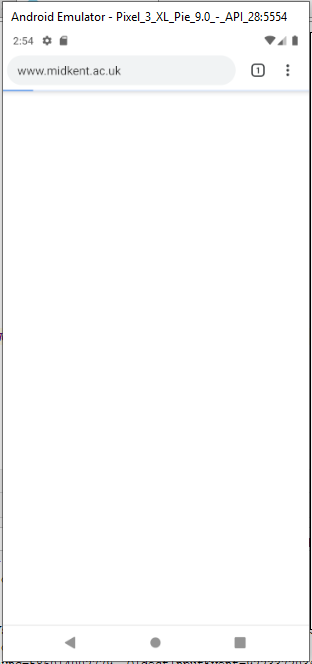
- A button that opens a website in a webbrowser
- A button that opens another page in the app
- A button that opens the phone application and places a set number
- A button that opens the google maps app with a set location identified
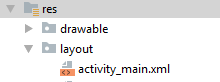
1. First in your app ensure that you have open the "actvivity_main.xml file. (This can be found in the project window and under app → res → layout)
2. Once open we will move in to the design view of the android studio, from here we will be creating 4 buttons, these buttons will be used to trigger 4 different events.
The code lines below demonstrate that the xml is almost identical, apart from the id's
.png)
.png)
.png)
.png)
3. At this point you may notice that the button objects when the app is compiled and run in the emulator are stacked on top of each other, this is due to the constrained layout that we are using as default, however, this can be addressed by adding the following at the bottom of each of the button xml statements

Where the text variable of "@id/openwebsite" is you are able to type the button id that you wish to have the button appear below.
At the top of our "activitiy_main.xml" page we have the default declaration of

we need to amend this to

dont forget that we will need to change the close tags to at the bottom of the xml.
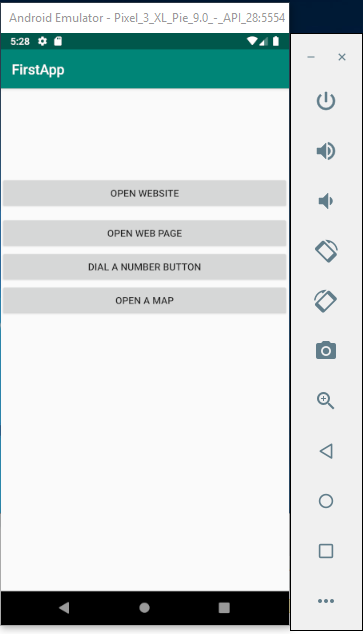
The output in the emulator should be as displayed below.
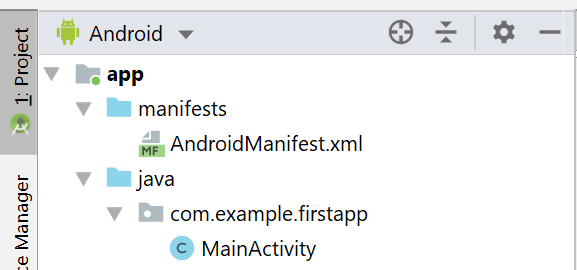
4. Now we are going to attach the actions that we would like the buttons to perform once clicked. We will need to open a new section within our android studio app, this is where we will be creating our Java.
once opened you will see the following code in the code editor section.

5. We first need to add an implement to our Public class declaration, this will enable the app to listen for the click of an object.

We then need to add the button names that we have created in our actvivity_main.xml document
6. Now it is time to set our listeners and to set our variables.
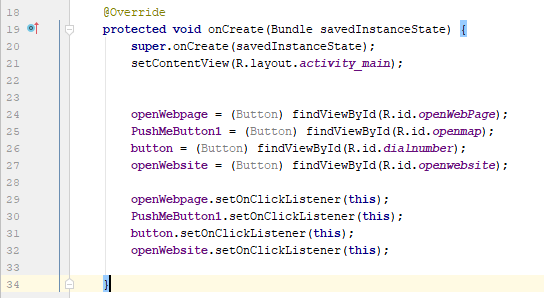
You will see that on lines 24 - 27 we are setting the variable elements within the app, here you will see that we are setting "openWebpage" to a button and that we will be finding the object by its id in the xml and this is "openWebPage".
As you can see you do not have to use the same name in your variable declaration as to the object id that you are targeting. However, it may be good practice to do this as you may get confused.
Lines 29-32 are where we set the newly created variables to listen to the app.
7. Now we are going to set the Intents for the click of the button, this is the action that will be triggered once the click has been detected.
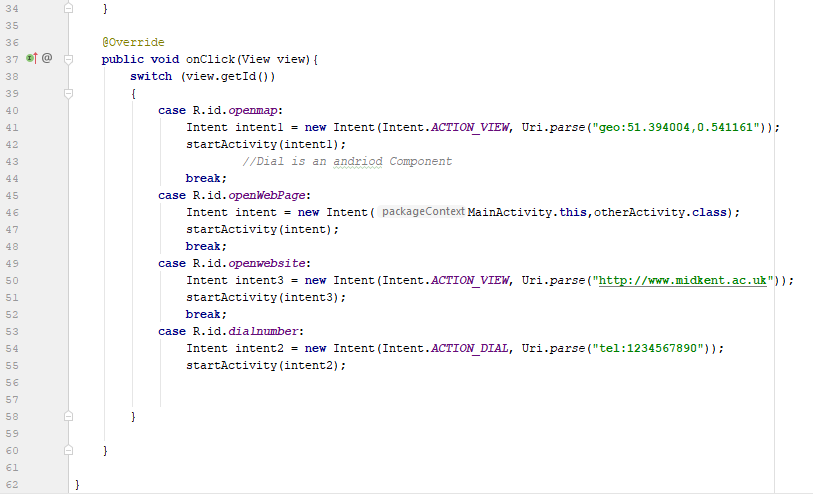
first we need to ensure that we are outside of the "Public Class" declaration so that we can create our new "Public void" (line 37) we need to set this to be onClick as the event, within the parentheses you will need to enter View view.
On line 38 we use the "switch" command to get the value of the button clicked and to then send it to the right "case" to trigger the Intent.
8. The Intent!
8.1

In this section of our code, you will be able to see that the intent uses "Action_VIEW" (line 41). The action view will open the google maps application where the parsed value for the geo-reference will be input.

8.2

In this button intent instance, you will see that our intent has a reference to the "MainActivity" and then "otherActivity". What is happening here is that the user will on click be taken from the MainActivity page to another page called "otherActivity" this would be useful in an app as it could take a user to an information page, or a developer information page or even an about the app information page.
8.2.1 How to get to create a new activity in our app? We will need to navigate to our project window in android studio and right-click on the layout tab, as in the picture below.

from the new option in the menu select Actvitiy → Empty Activity. ![]()
Creating a new empty activity will create the associated xml and java pages in the project ready for us to make use of them.
![]()
8.2.2 Now we need to open the new otherActivity.java page as it would be nice to allow our users to know once that they have clicked that they have moved to the new page.
![]()
8.2.3
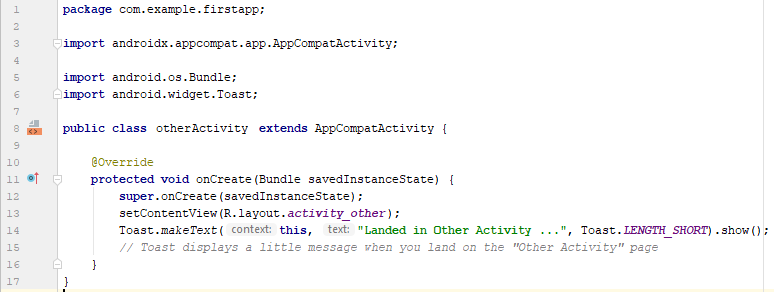
Here we can see that we have added a new "import" (Line 6) to the "otherActivity" page this will enable us to use the "Toast" widget in our app. "Toast" this is a function inside of the android app that displays a message to the user on the opening/loading of the page (Line 19).
![]()
8.3

8.4 Dialing a number inside of the app.

As you can see from line 54 we need to set the Intent, we then give it a name of intent2 ( this is due to us having more than one and to make it meaningful) the intent is going to be a "new" Intent. Inside of the parentheses we need to tell the intent what action we would like to happen, in this instance "ACTION_DIAL". This will take the user of the app to the dialer application inside of the android phone and then it will parse the value within the next set of parentheses using "tel". This essentially passes the value to be used in the telephone.
On line 55 the intent is actioned by starting it using "startActivity" and selecting the intent name (intent2).
The outcome of the dial a number should be as displayed below

Last Updated
2020-03-30 12:30:54
English and Maths
English
Maths
Stretch and Challenge
Stretch and Challenge
- Fast to implement
- Accessible by default
- No dependencies
Homework
Homework
Equality and Diversity Calendar
How to's
How 2's Coverage
Anonymous Assessment - Learners assess an anonymous piece of work containing deliberate mistakes against given success criteria.
Anonymous Assessment - Learners assess an anonymous piece of work containing deliberate mistakes against given success criteria.
Links to Learning Outcomes |
Links to Assessment criteria |
|
|---|---|---|
B2 Designing a mobile app |
Files that support this week
Week 3→
Next 3Week 4→
Next 4Week 5→
Next 5←
Prev3